Image Optimisation
It’s crucially important that all our sites have crystal clear images whether it be a product shot or a photo.
Image exporting/compression is an art and should be taken seriously. As a minimum, every bitmap export should be done at 2x or above.
Format Use Cases
As a general rule of thumb we should be exporting assets in either SVG, JPG, or PNG, and convert to WEBP where appropriate. Their rough uses cases are:
JPG
- Mainly used for photos with people in them
- Or an illustration that doesn’t have clear edges or has textures
- Can also be used when an image has high complexity (gradients, textures, shadows).
- Max acceptable file size: ~400kb.
WEBP
- Modern image format that provides superior lossless and lossy compression
- WebP lossless images are 26% smaller in size compared to PNGs
- WebP lossy images are 25-34% smaller than comparable JPEG images at equivalent SSIM quality index
- Lossless WebP supports transparency (also known as alpha channel) at a cost of just 22% additional bytes
- For cases when lossy RGB compression is acceptable, lossy WebP also supports transparency, typically providing 3× smaller file sizes compared to PNG
- Can be used in place of JPEGs for similar use cases to benefit load times and page speed the most
- Online converters such as Convertio can be used
- Max acceptable file size: ~300kb.
PNG
- When exporting low complexity files that are bitmaps we need png as it has better lossy compression than JPG
- Should be used if we need the transparency (alpha) layer
- If we can’t use an SVG for a product shot, we should use a high res PNG
- PNG are also useful for flat illustrations that have simple colours (crisp edges, no gradients)
- Max acceptable filesize: ~300kb
SVG
- The gold standard for image exports, but a tricky opponent
- SVGs should always be first choice for product shots, or simple illustrations
- Watch out for bitmaps contained within SVGs, we’ll need to compress those to get a decent file size
- Max acceptable filesize: ~300-500kb
Compression Examples
JPG
Here we have a complex image, there’s lots of gradients, there’s shading, noise etc. Obviously it’s not a vector so SVG is ruled out, PNG is good for simpler elements so probably not the right choice.
Exported at 2x uncompressed for JPG and PNG we get:

Completely unacceptable file sizes, let’s run this through ImageOptim

Much better, as we predicted JPG is the best option here. Whilst 690kb is still pretty high, this is the masthead of a homepage. Internet speeds are getting quicker and we want to provide the best experience. Whilst PNG is slightly sharper, 2MB is definitely further than we’d want to push.
If we’re able to, it’s good to try exporting 3x jpg first, as the extra resolution can often feel sharper when compressed, due to the larger resolution being scaled down. Use your best judgement here though, if we’re getting enormous sizes, stick to 2x.
PNG
Here we have a clear use case for a png, we have an asset that bleeds off the edge of another. As this asset has pretty solid colours, and no blurred shadows we can use PNG and still get a pretty low file size.
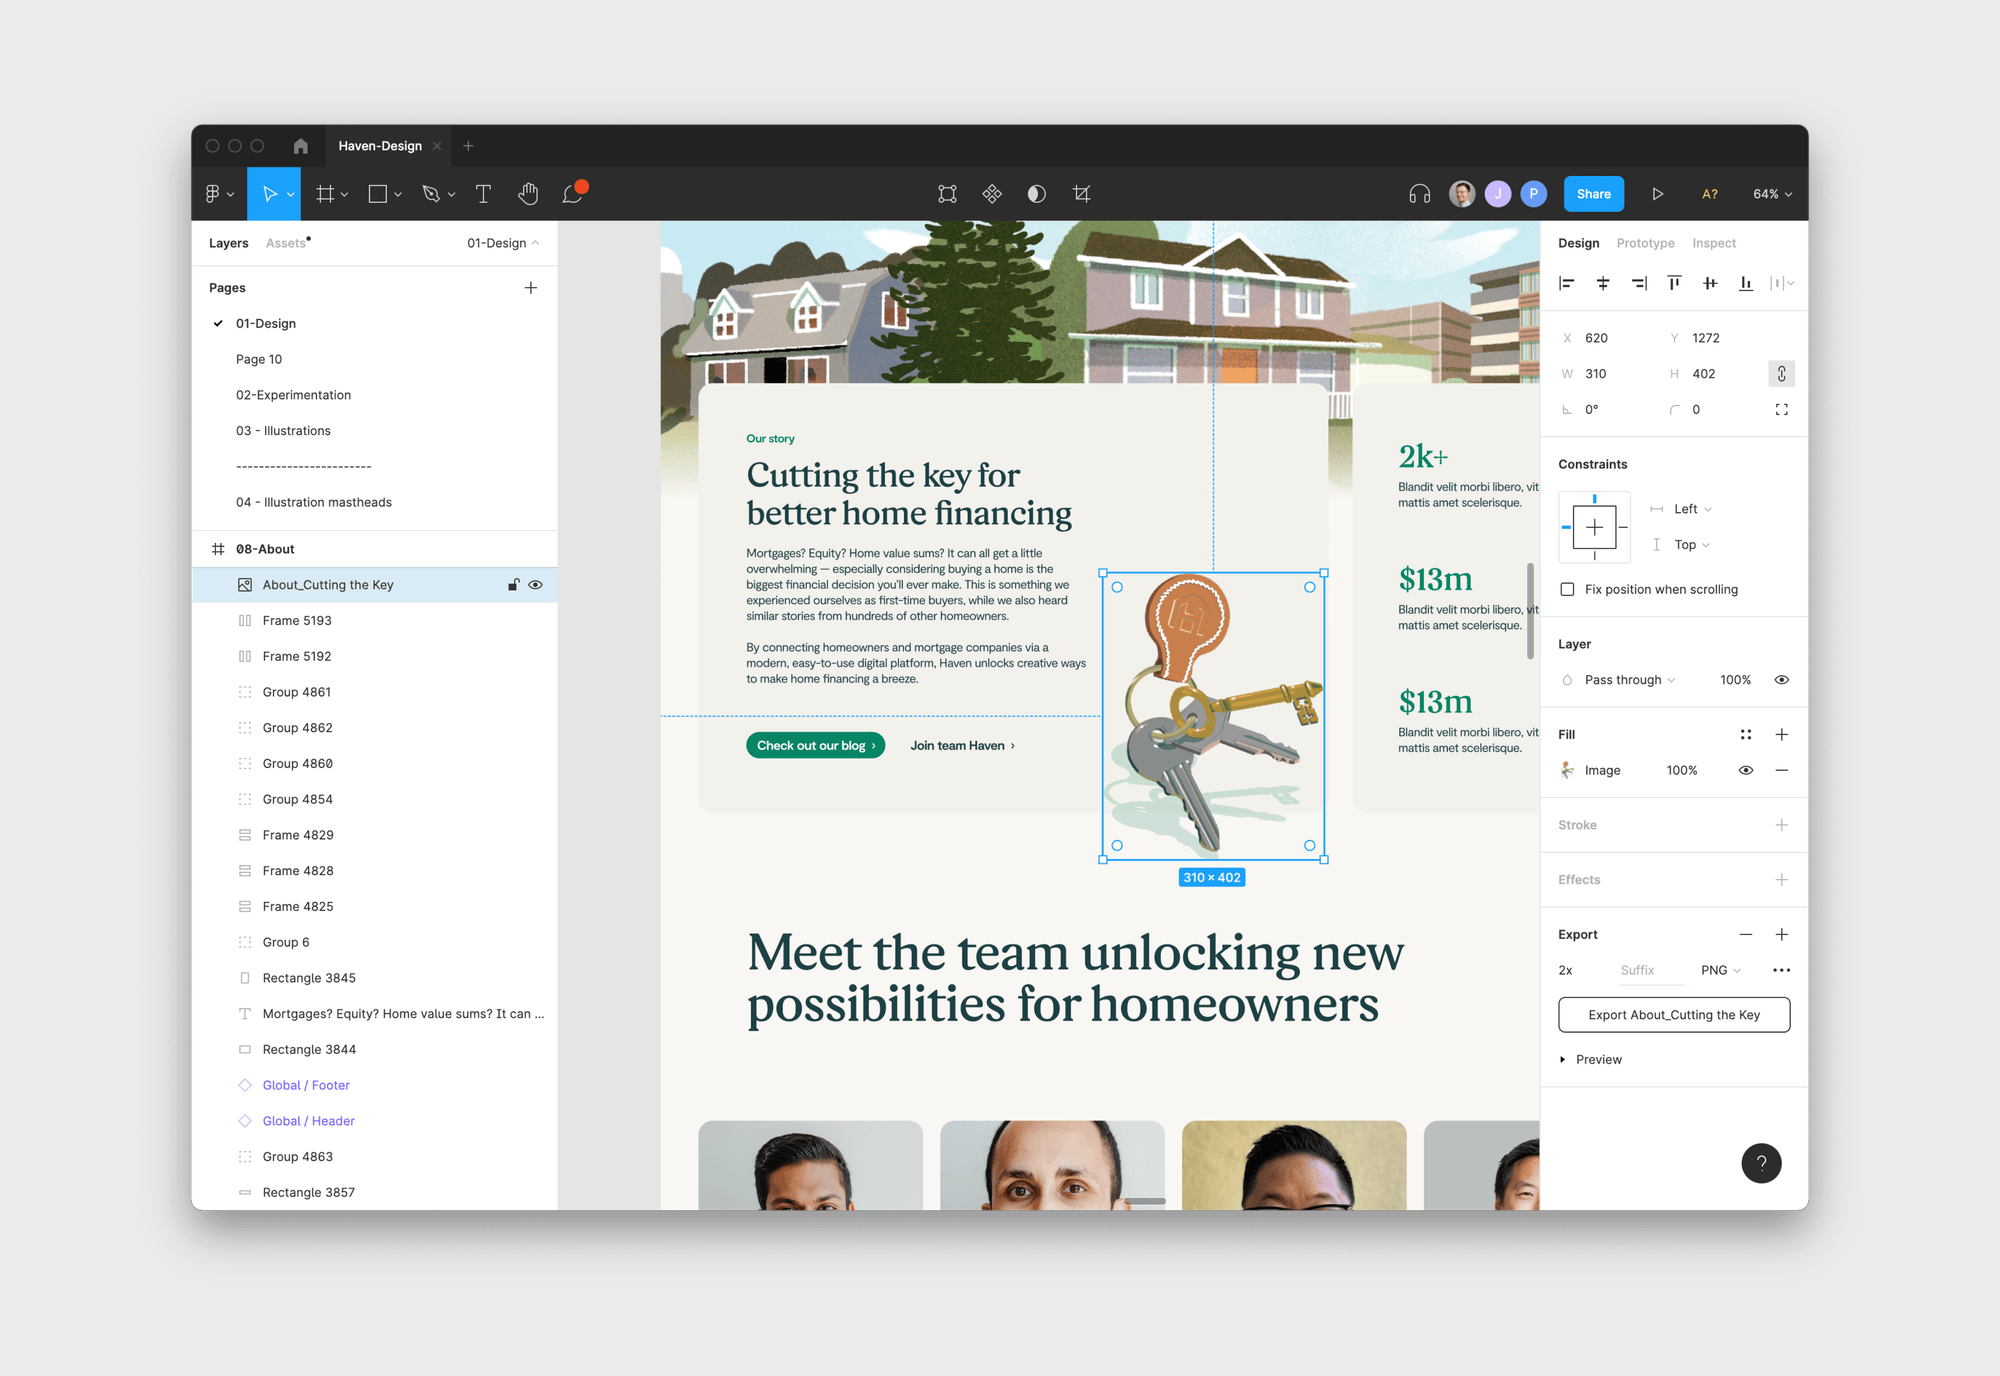
Uncompressed we get:
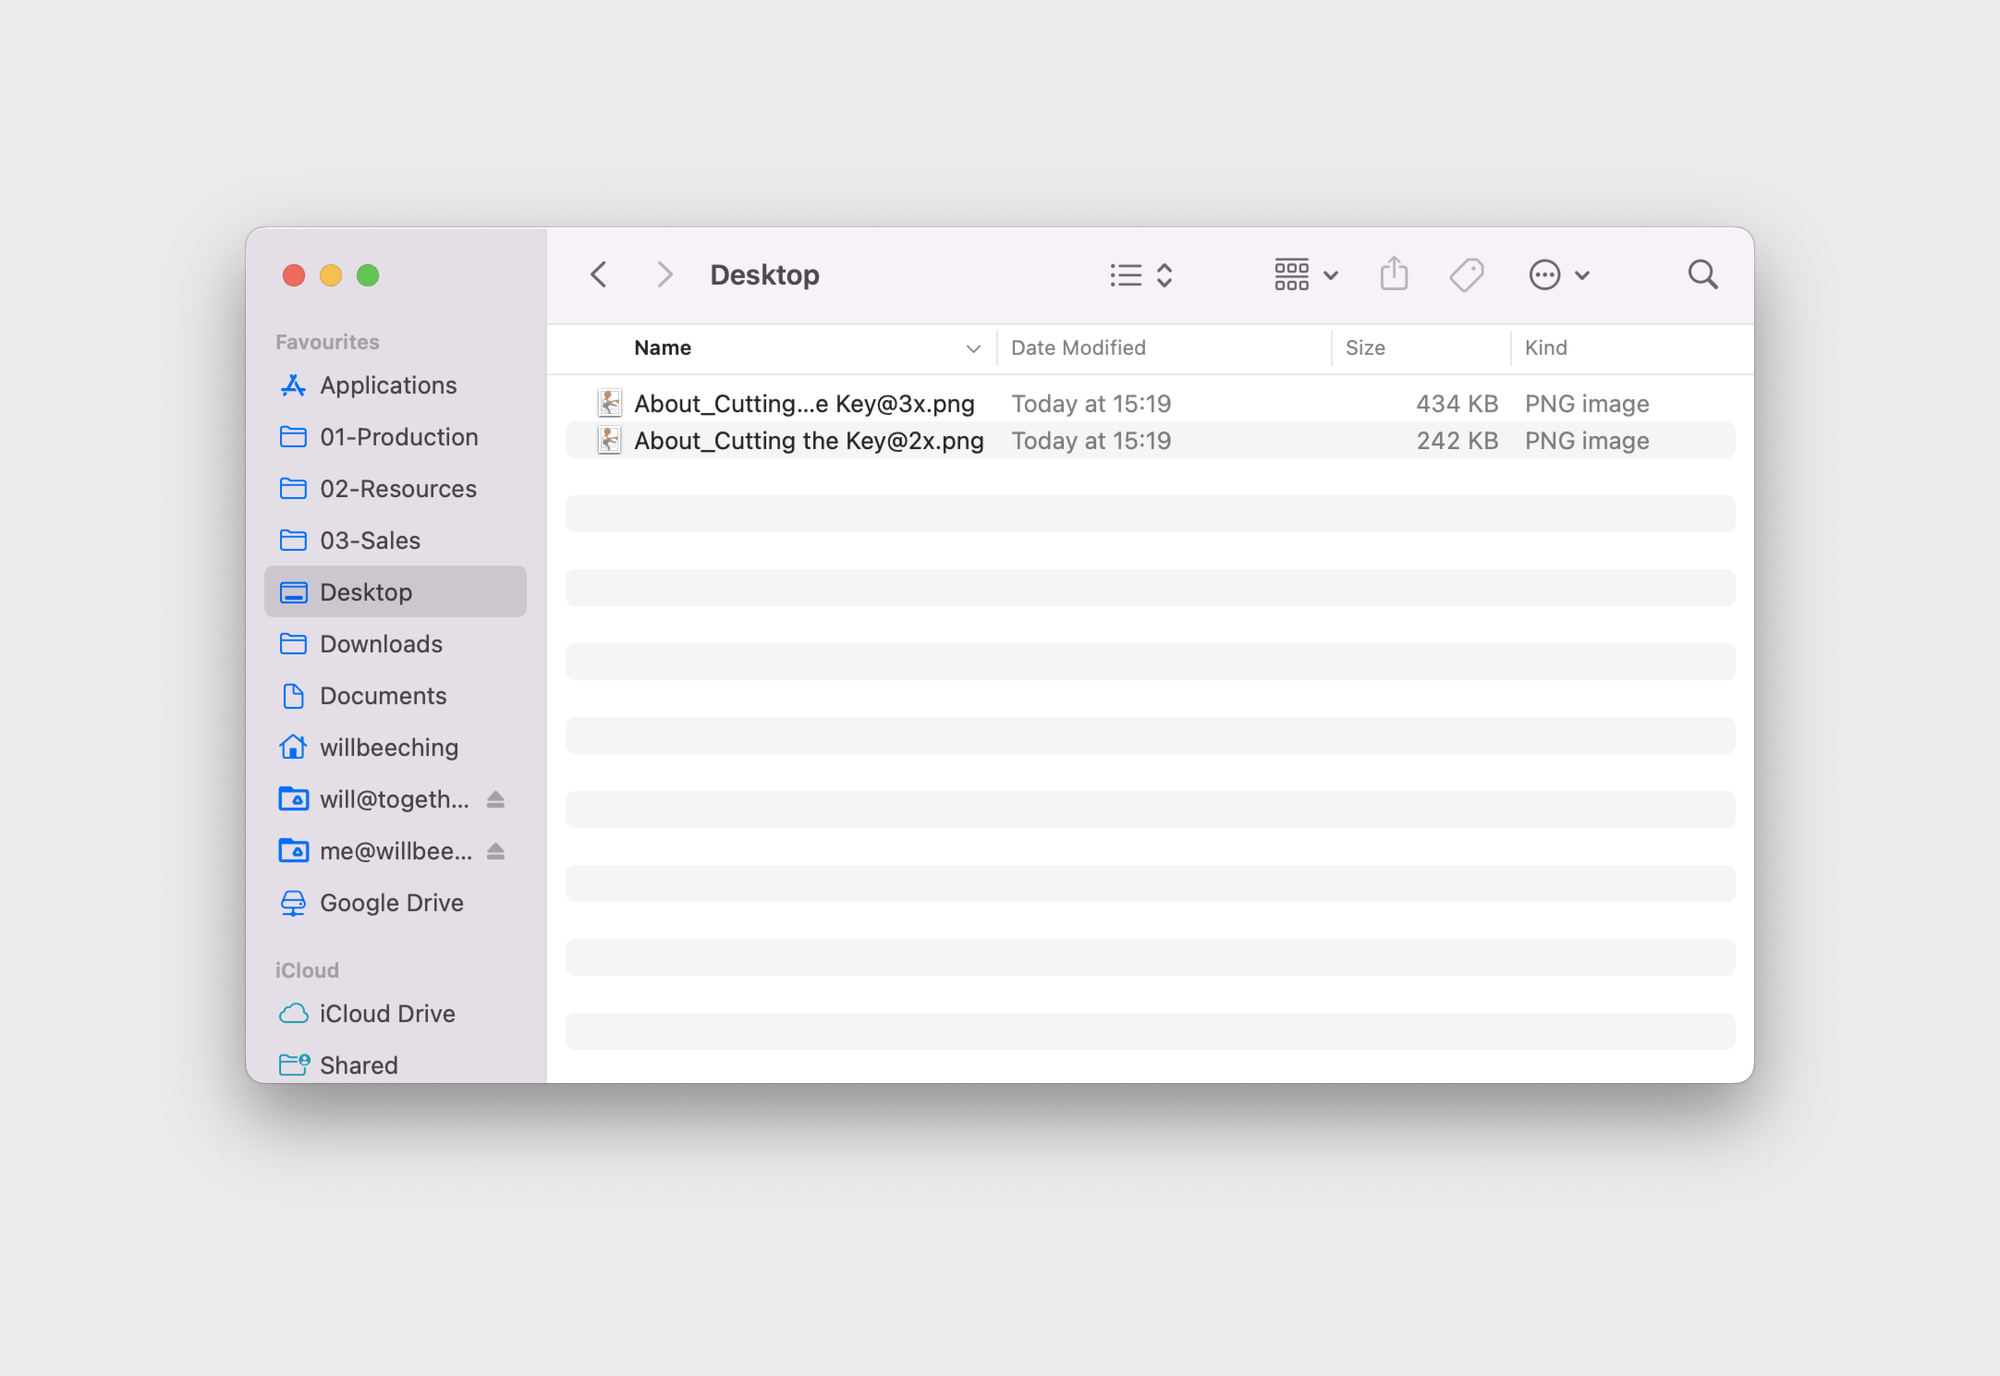
And compressed we get:

Here we can make a judgement call, if there are lots of other heavy images on the page, we should probably use the smaller one - especially if it’s not as crisp as we’d like. If the page is fairly light then we’d go for the sharper one.
SVG
Here’s an obvious use case for SVG, it’s all completely made up of vectors. Text is the first thing that people will spot when it’s not sharp.
Whilst SVG is actually the heaviest file (after compression), product shots are vitally important to the websites that we create. Here we favour sharpness and quality over file size. Unless your SVG is hitting over 500-600kb we should stick with them.
Things To Watch Out For
Dealing With Images inside SVGs
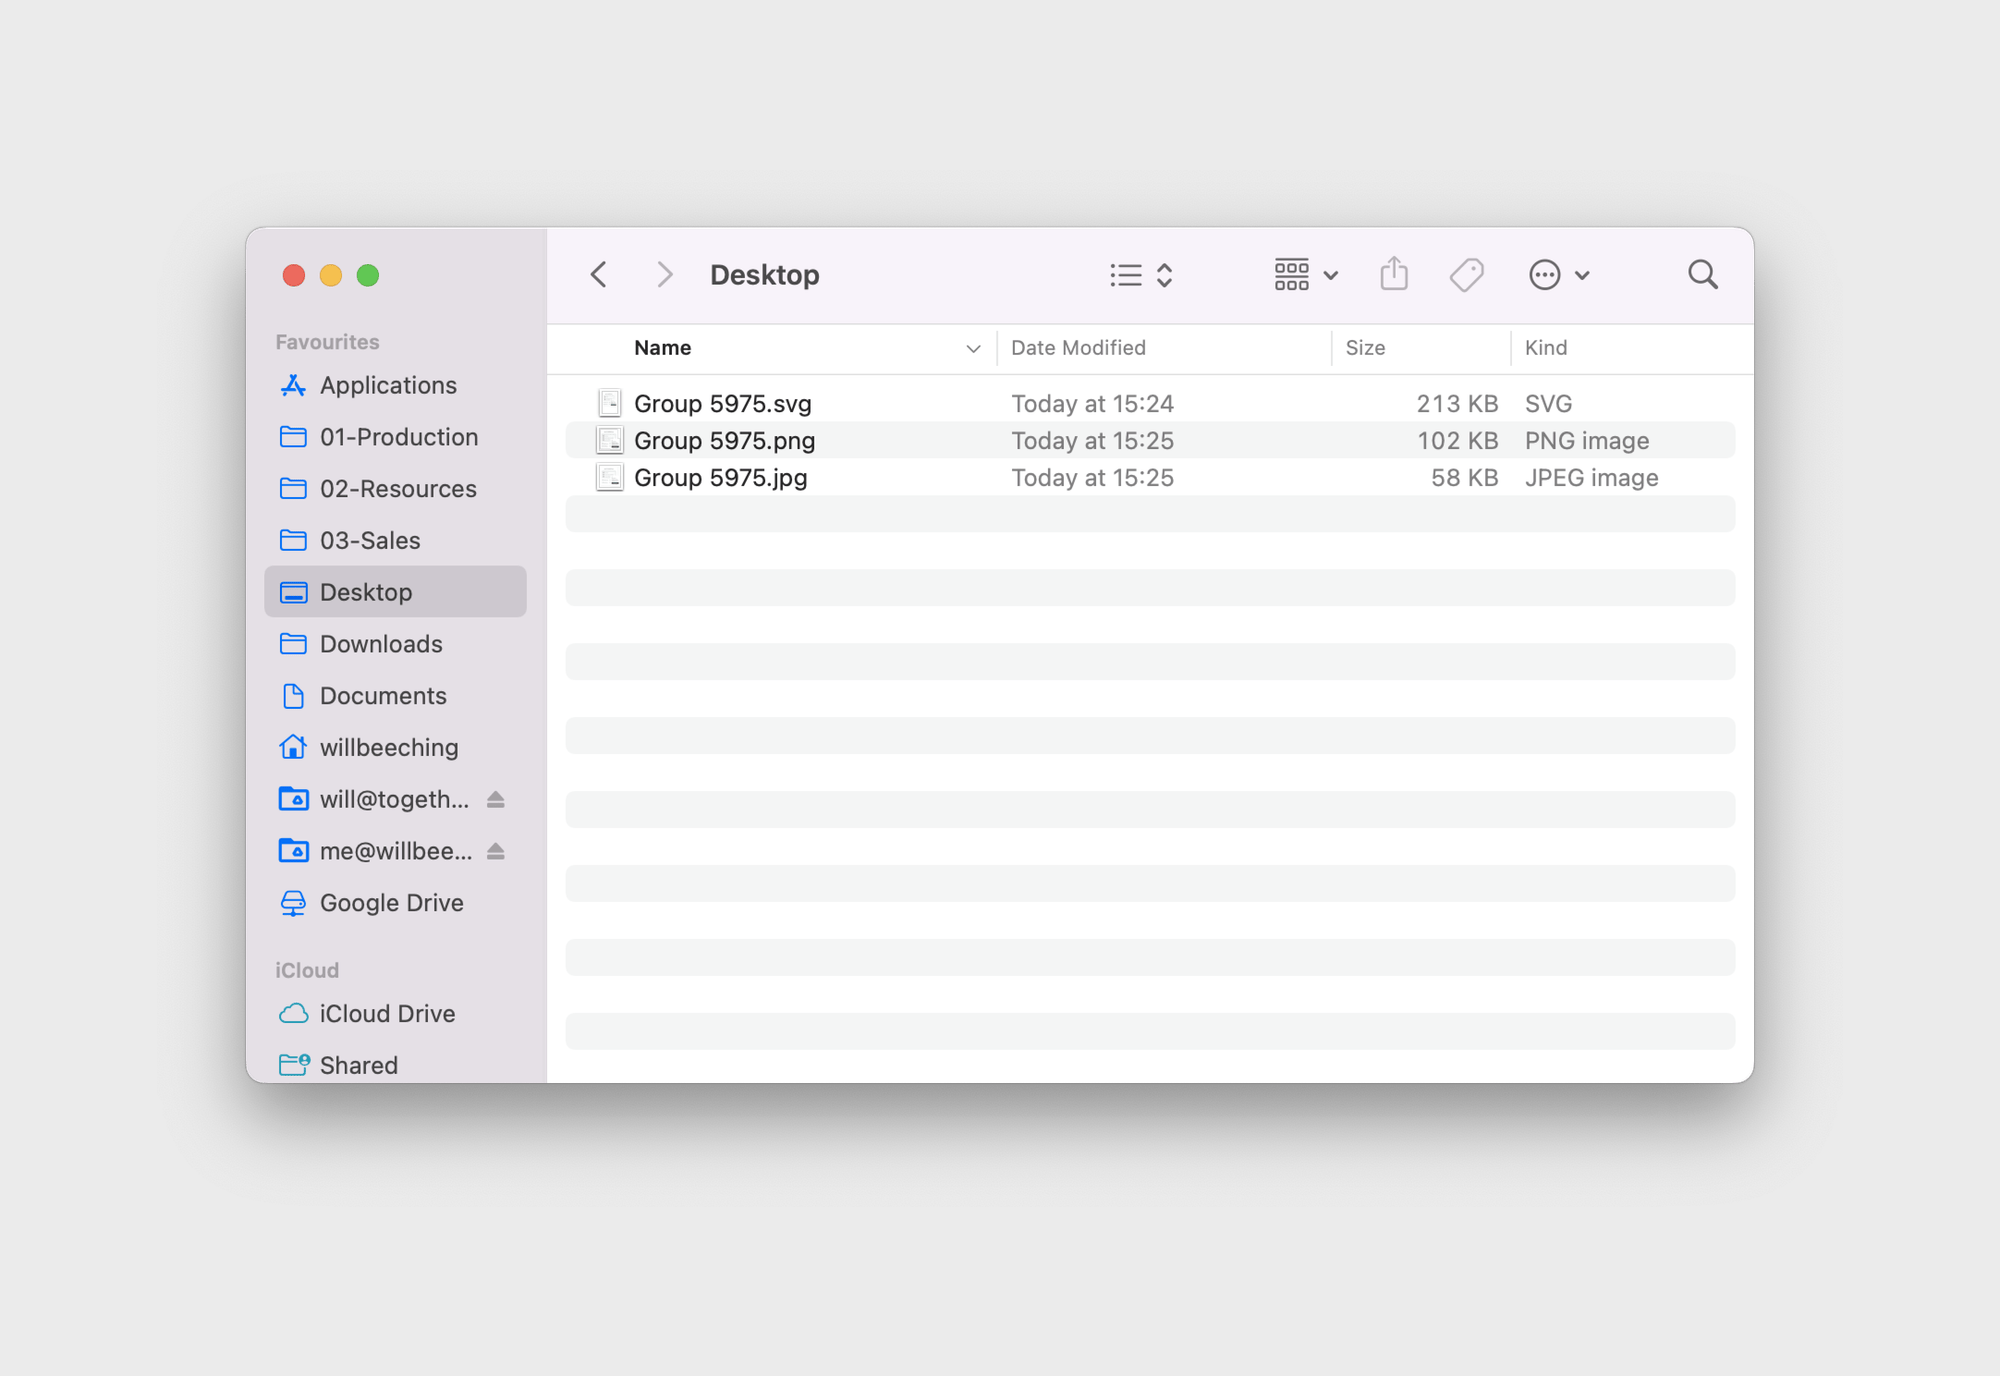
Now for a tricky one, a lot of the time we have a small bitmap image within a file that should be an SVG. The issue is that incase it needs enlarging in the future, design tend to use the highest possible quality file — the downside, large file sizes.
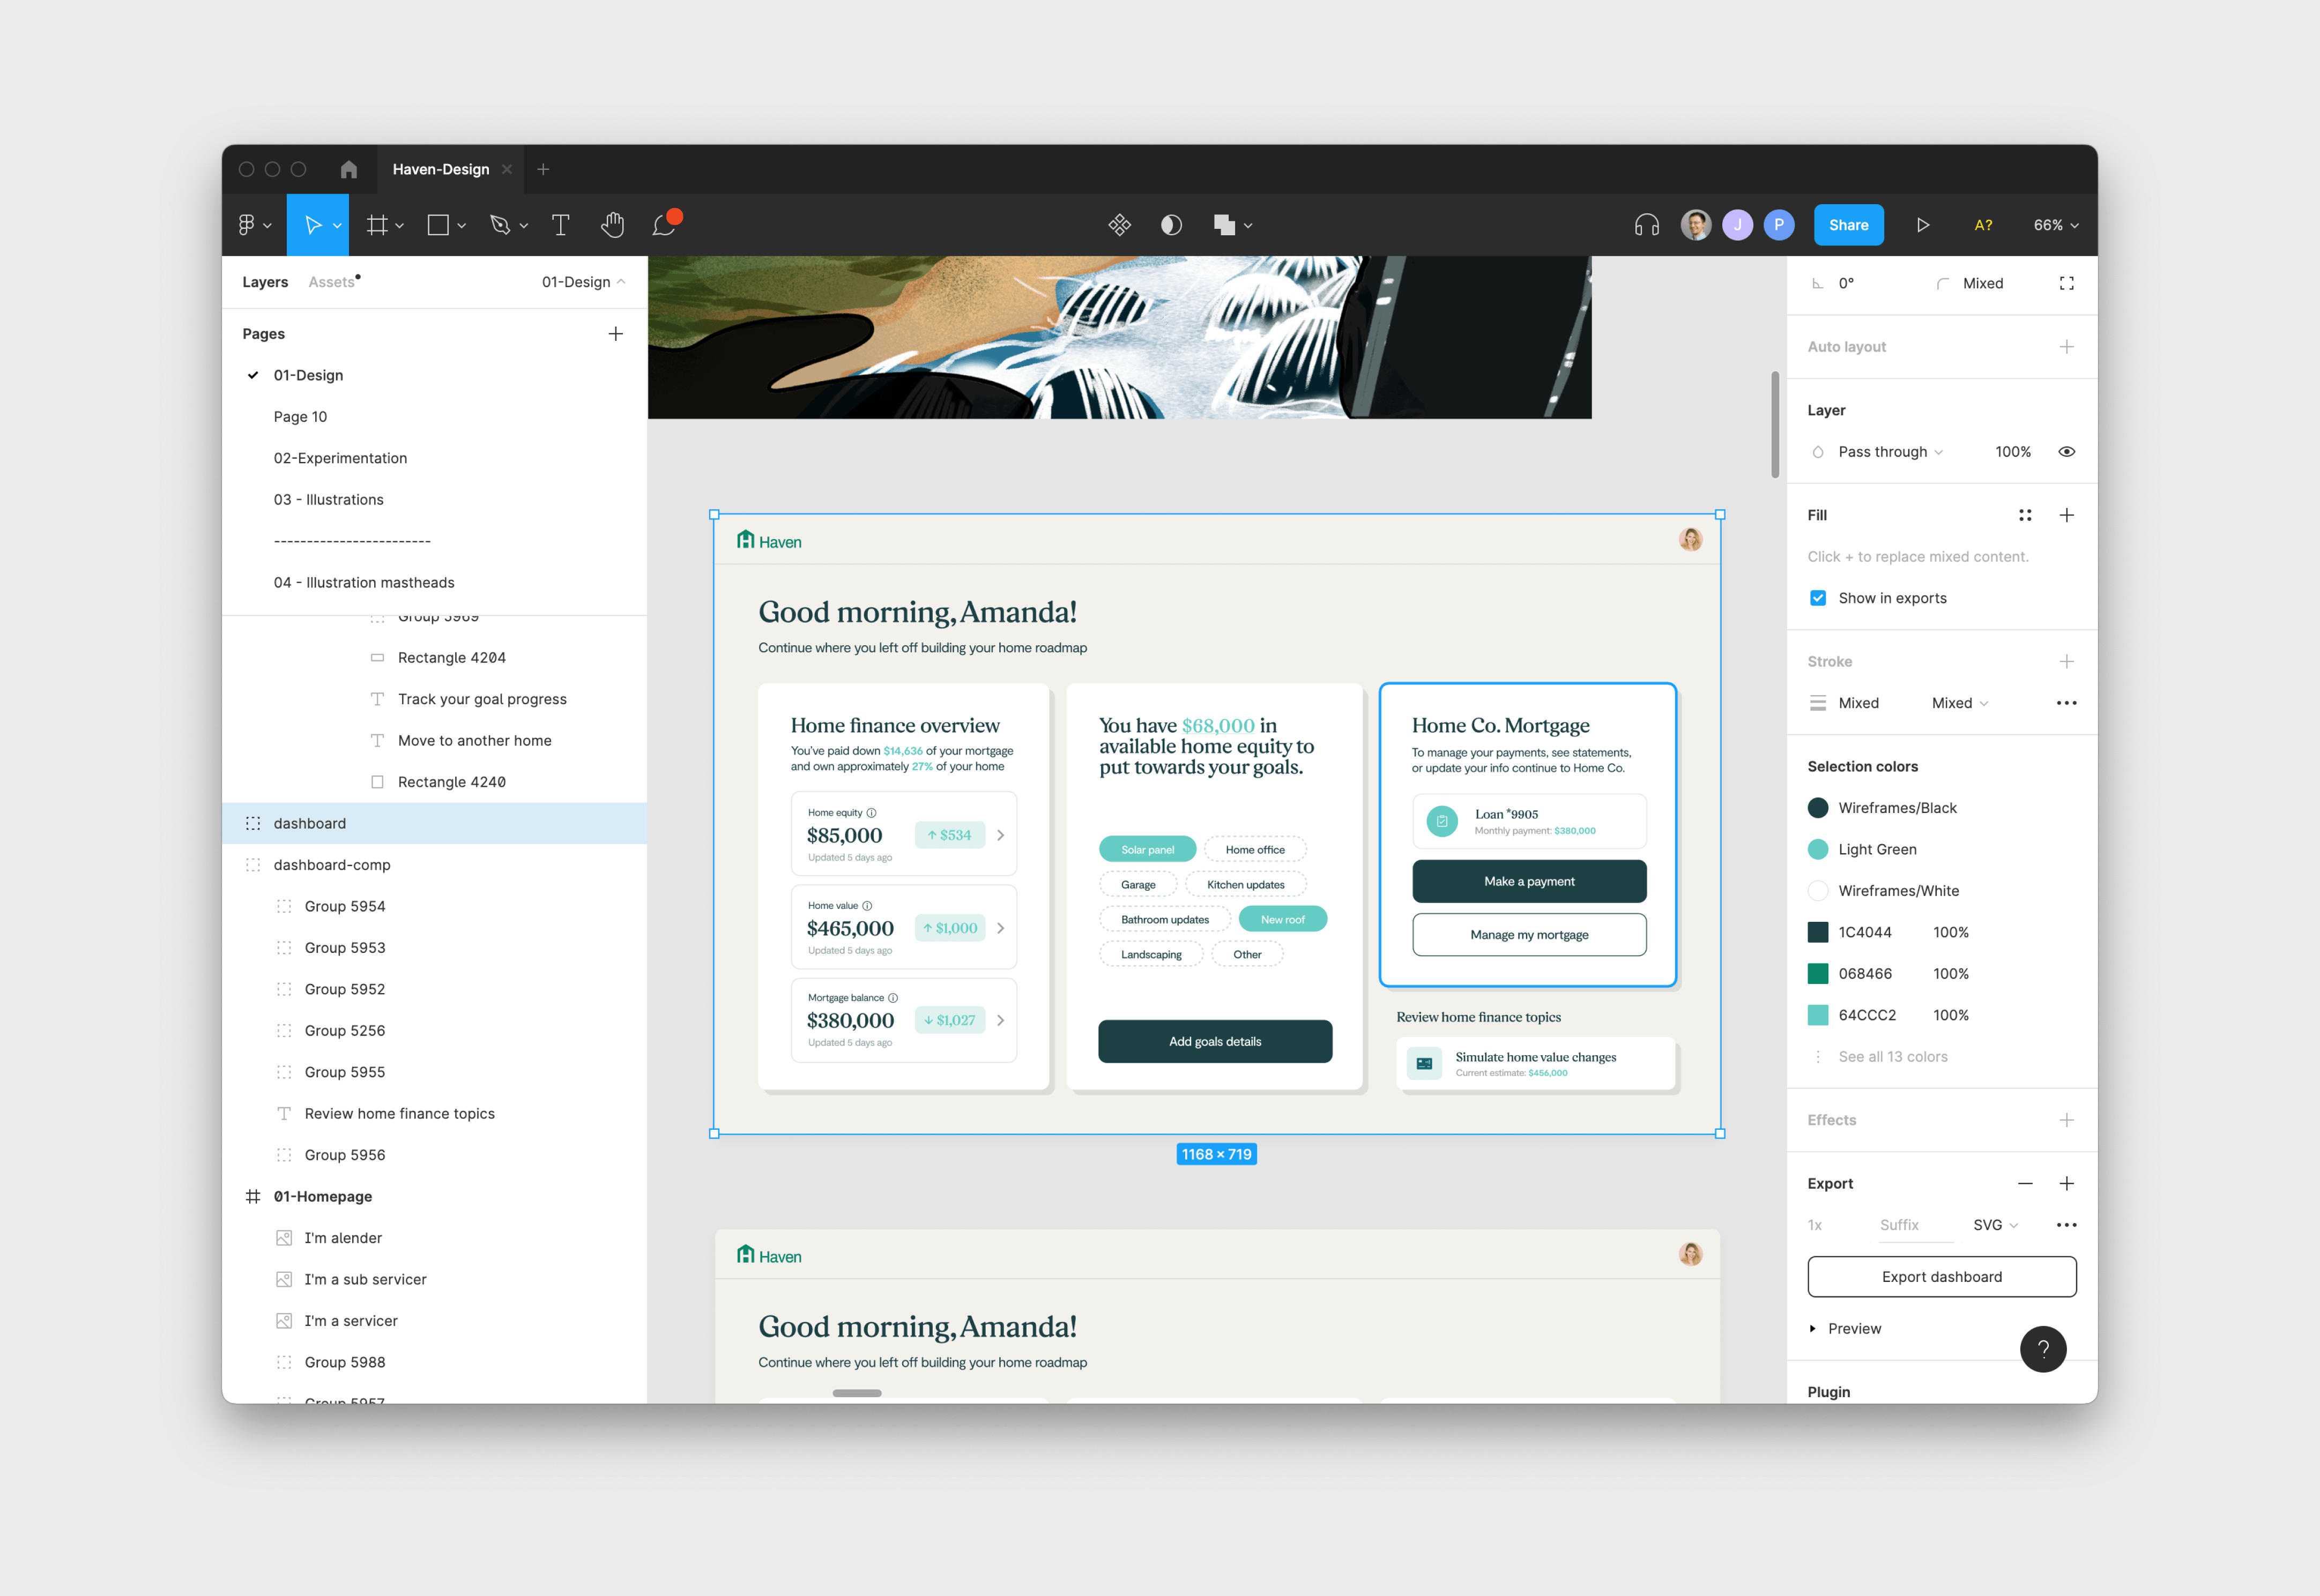
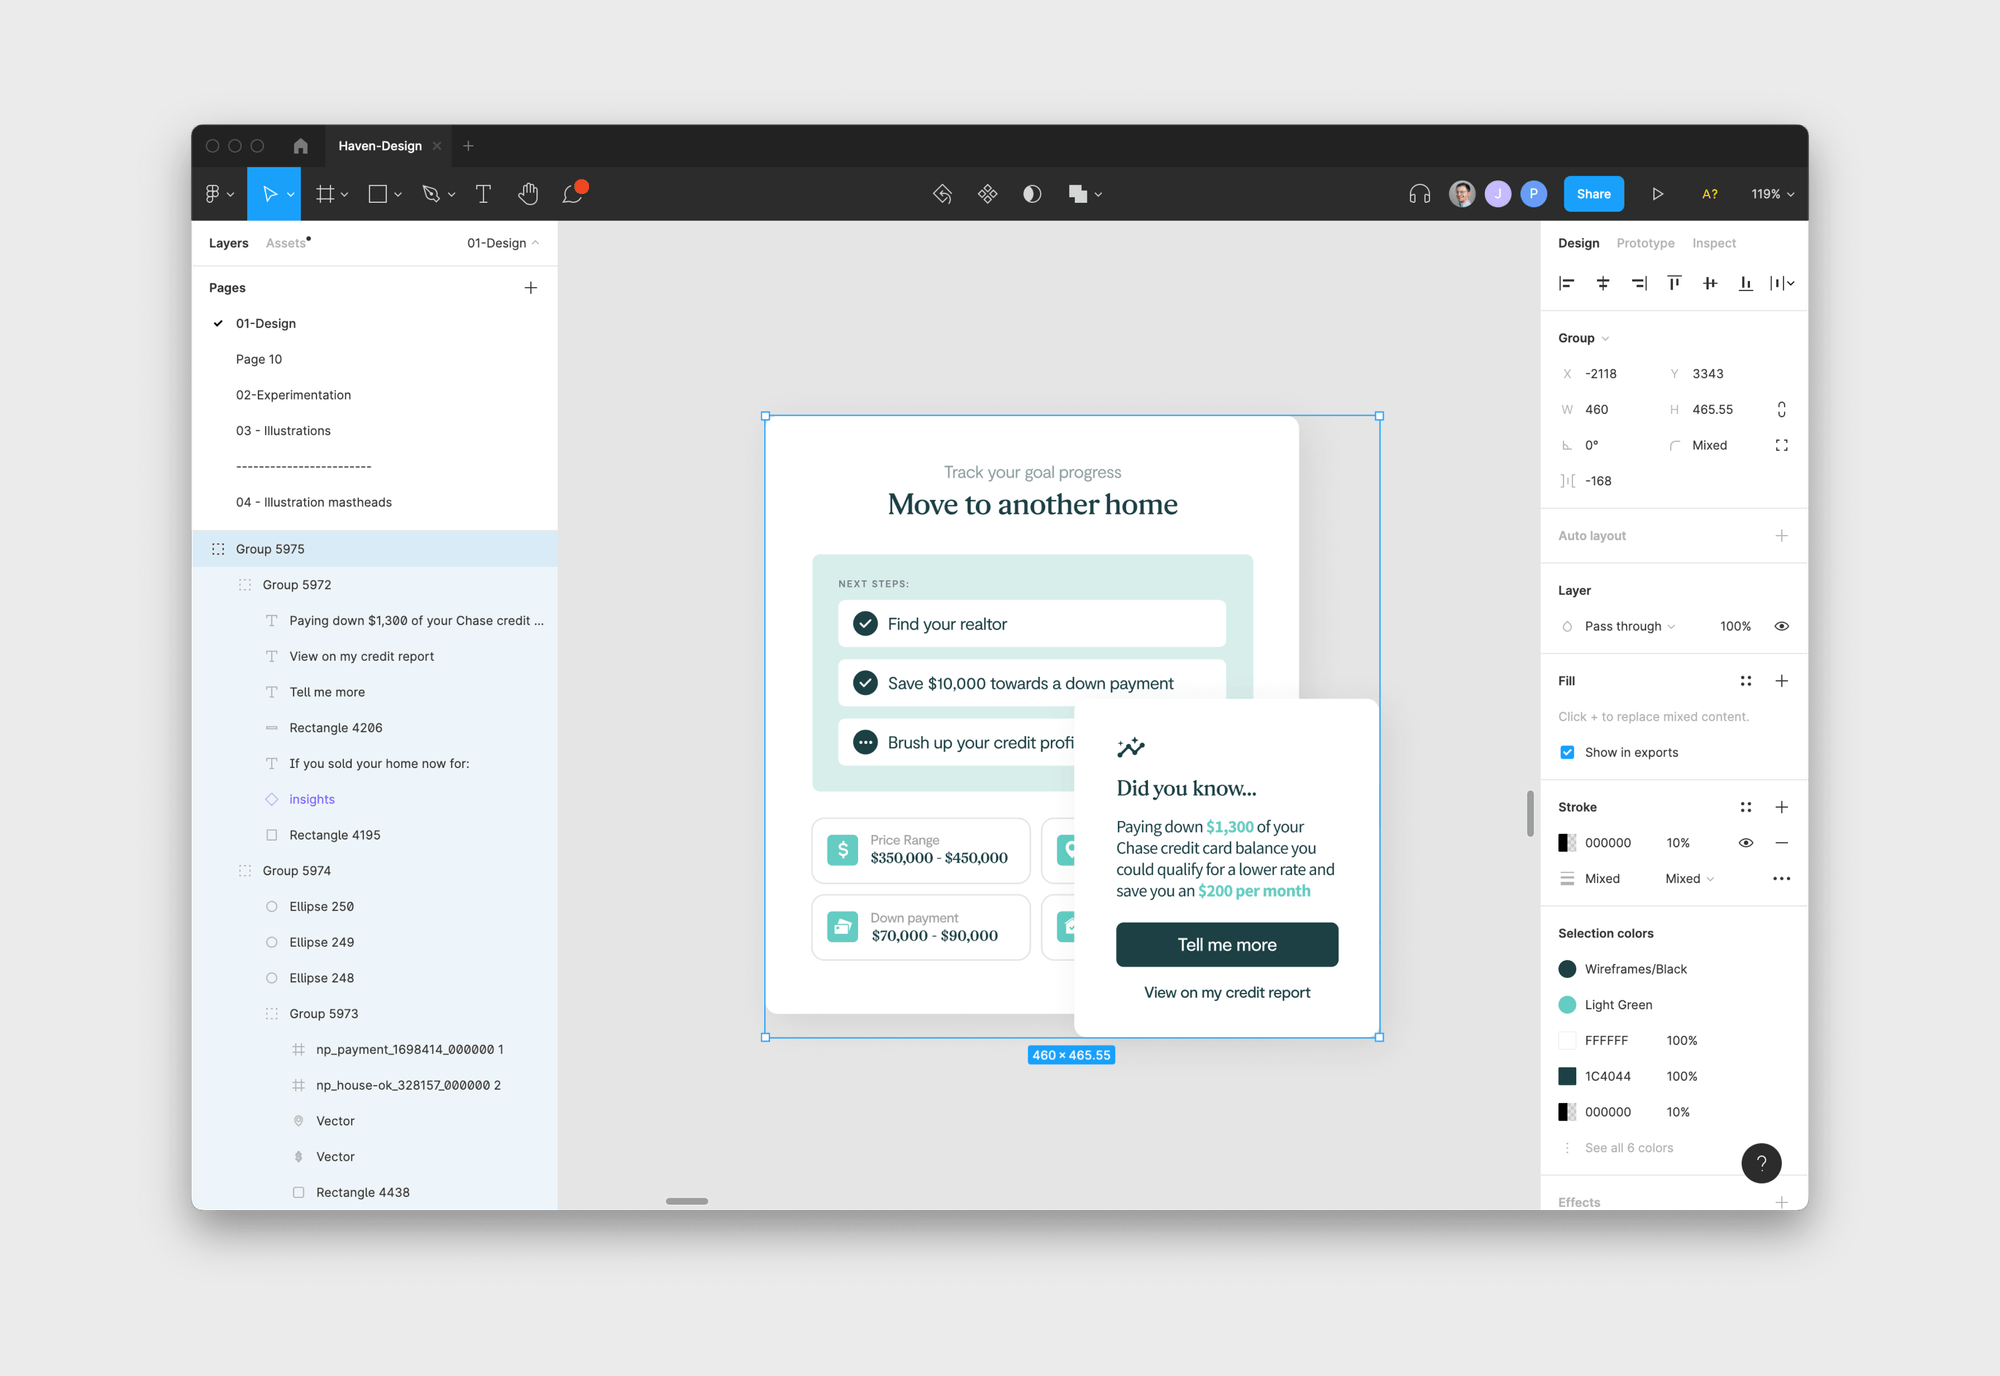
Here we have a fully vectored dashboard, but we have that pesky avatar up the top right. That’s giving us a huge file size.
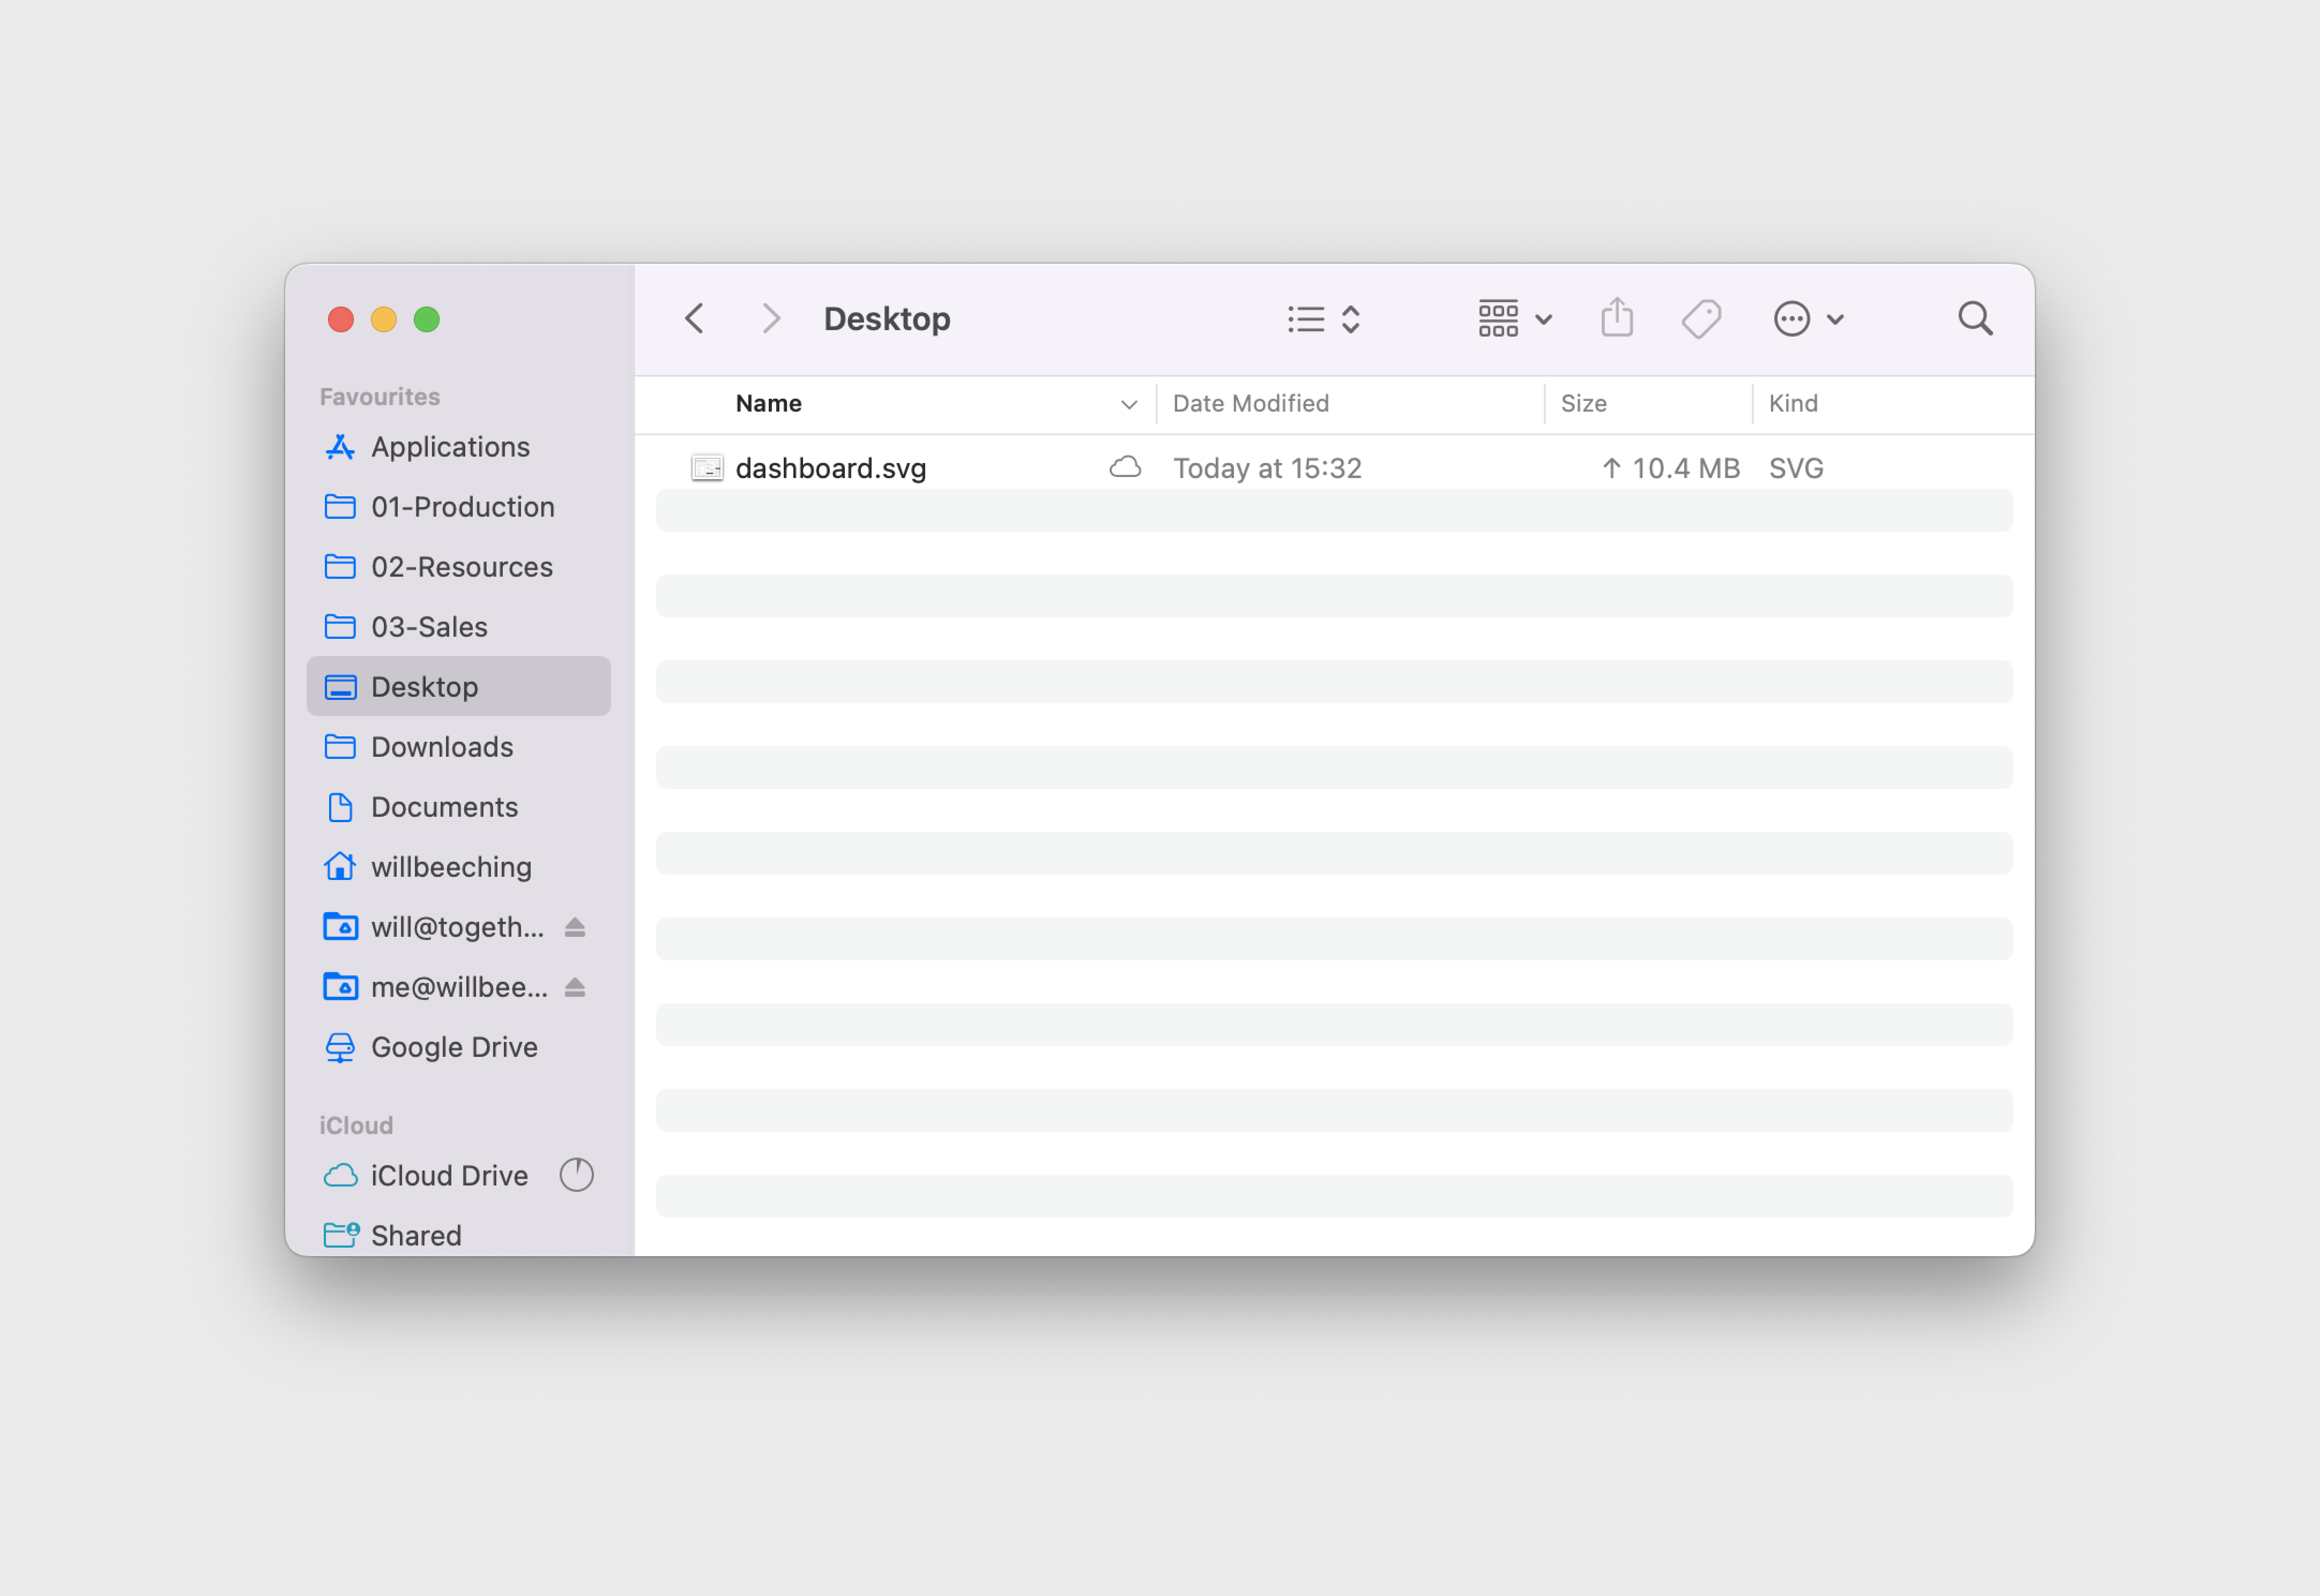
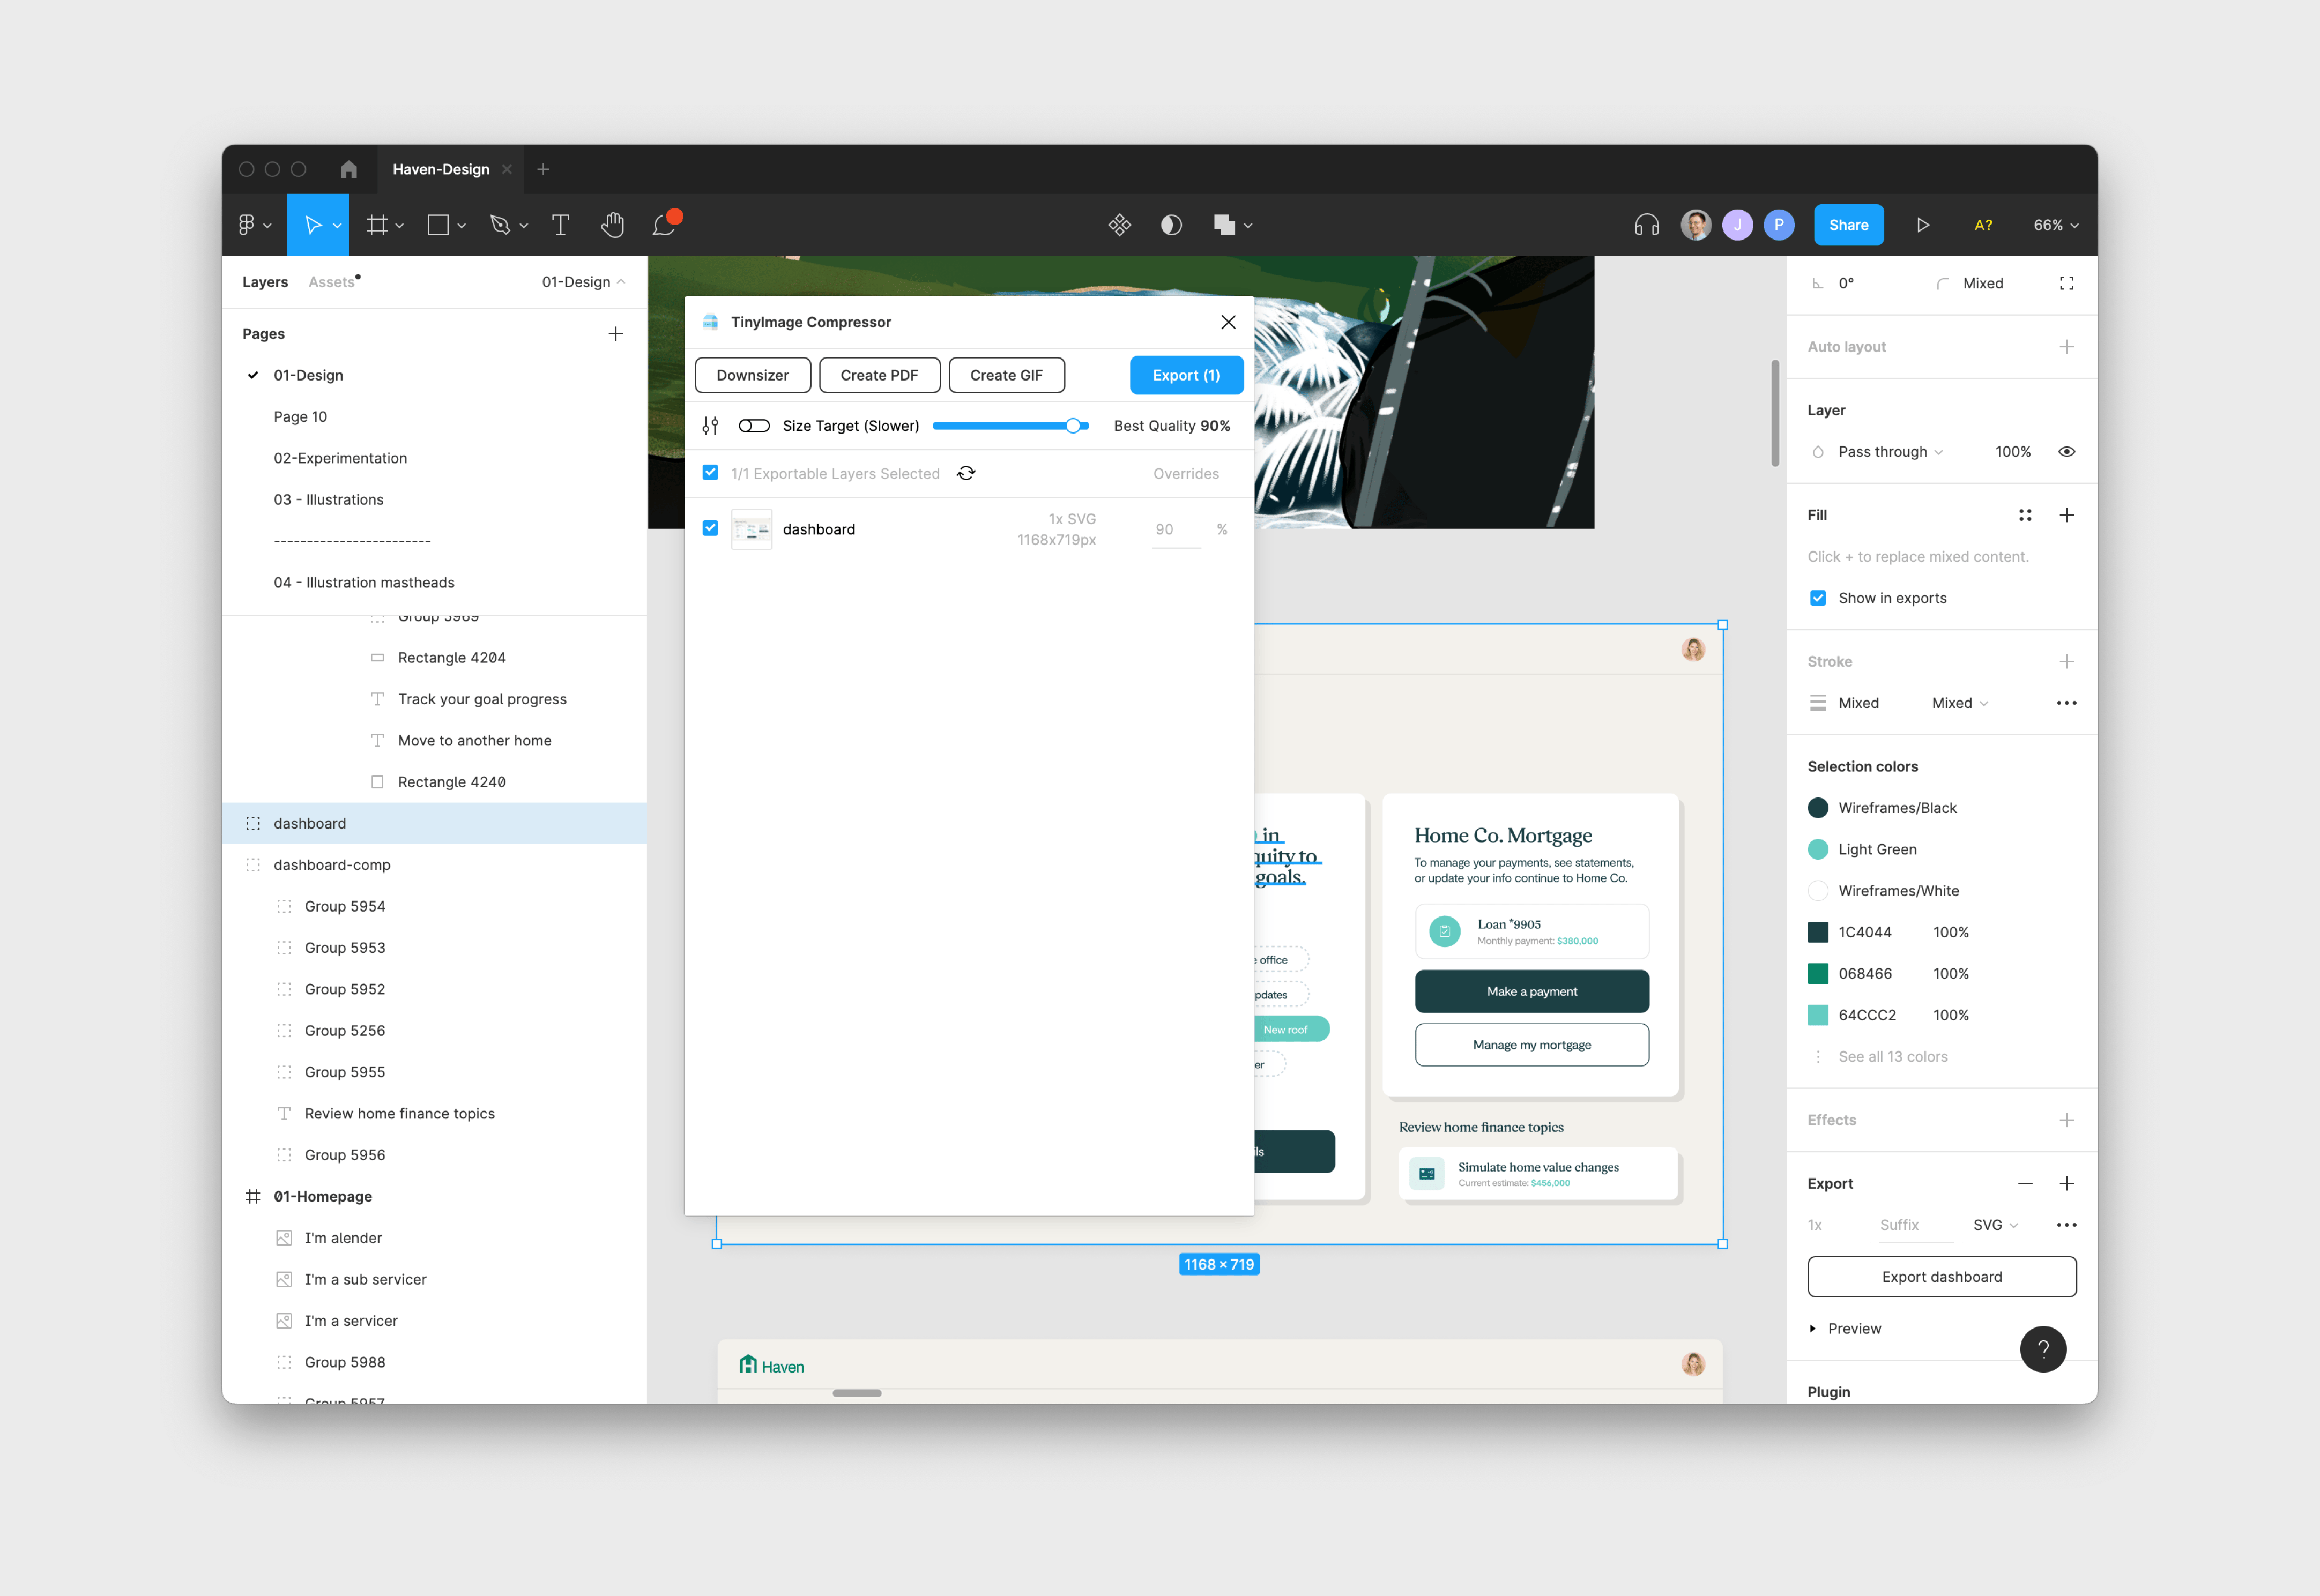
10.4MB — Yikes. Let’s grab our handy plugin: TinyImage Compressor. Make sure to make a copy of the file that you’re trying export in another page or another file.
Select the layer that you want and hit export as SVG. Don’t hit export yet though! Open up TinyImage.
Don’t hit export here either! You want to hit Downsizer. Then make sure @2x layer size is marked on.
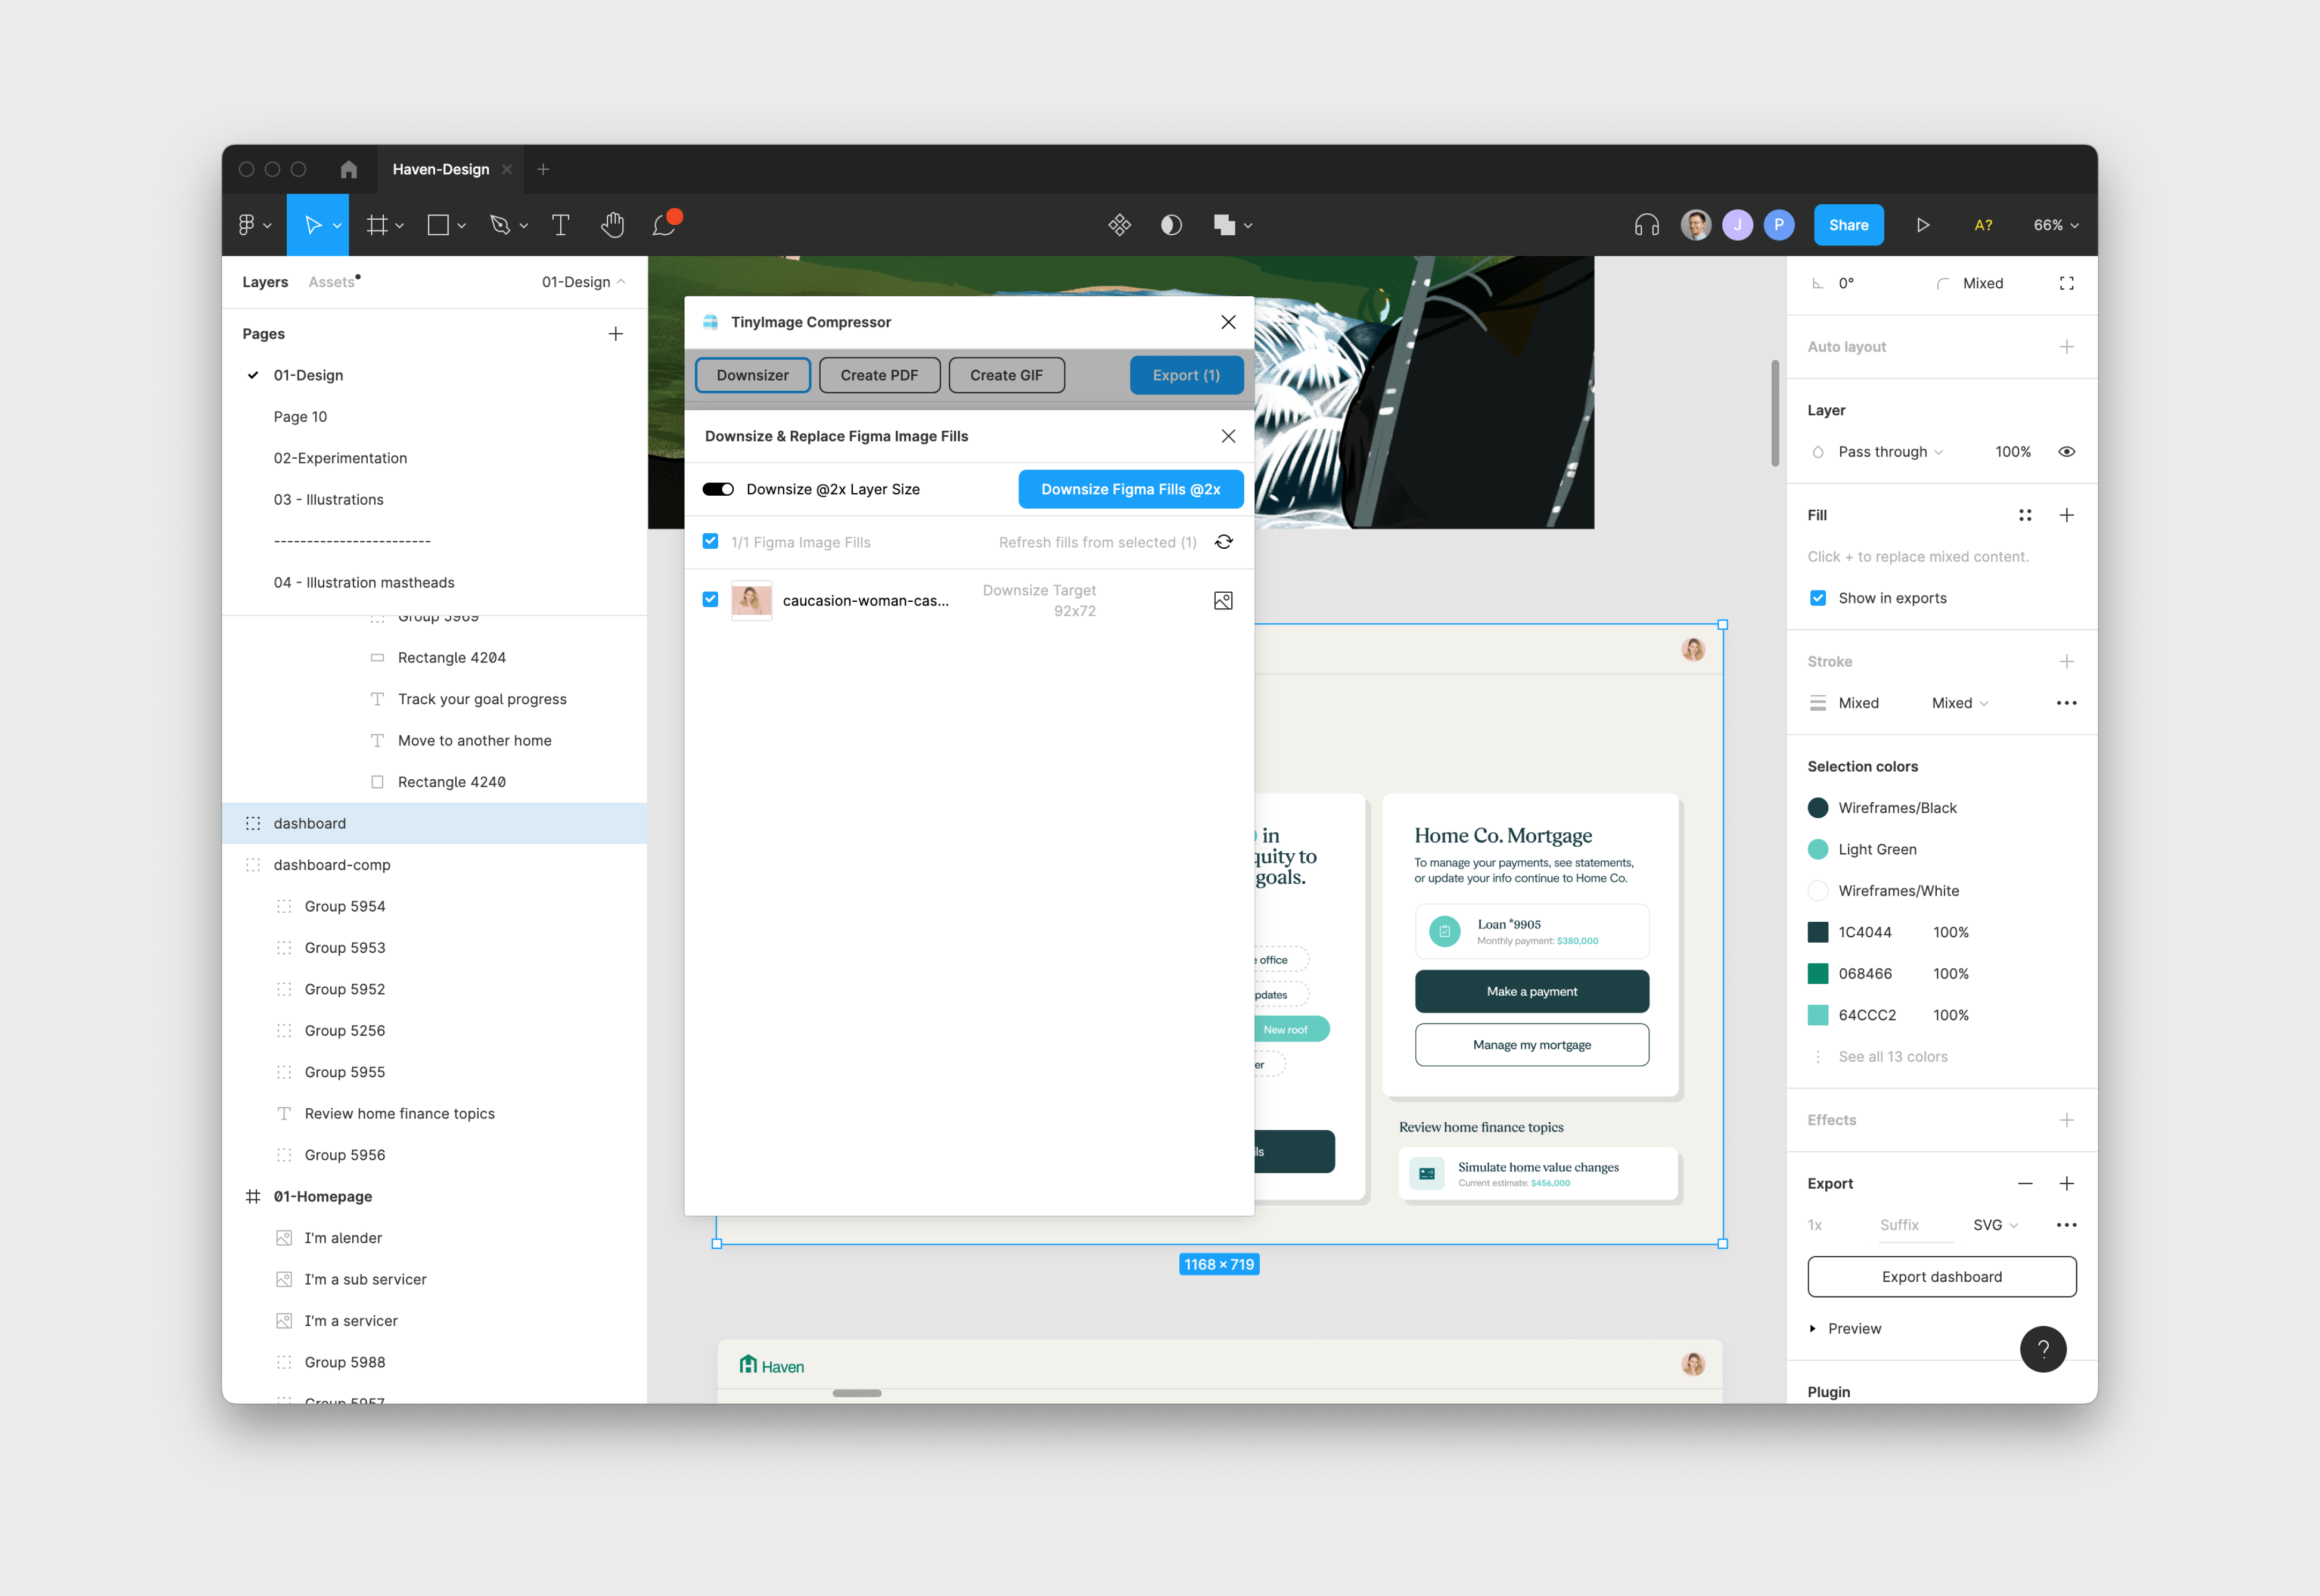
Now hit Downsize Figma Fills. Once that’s done it’ll tell you how much you saved.
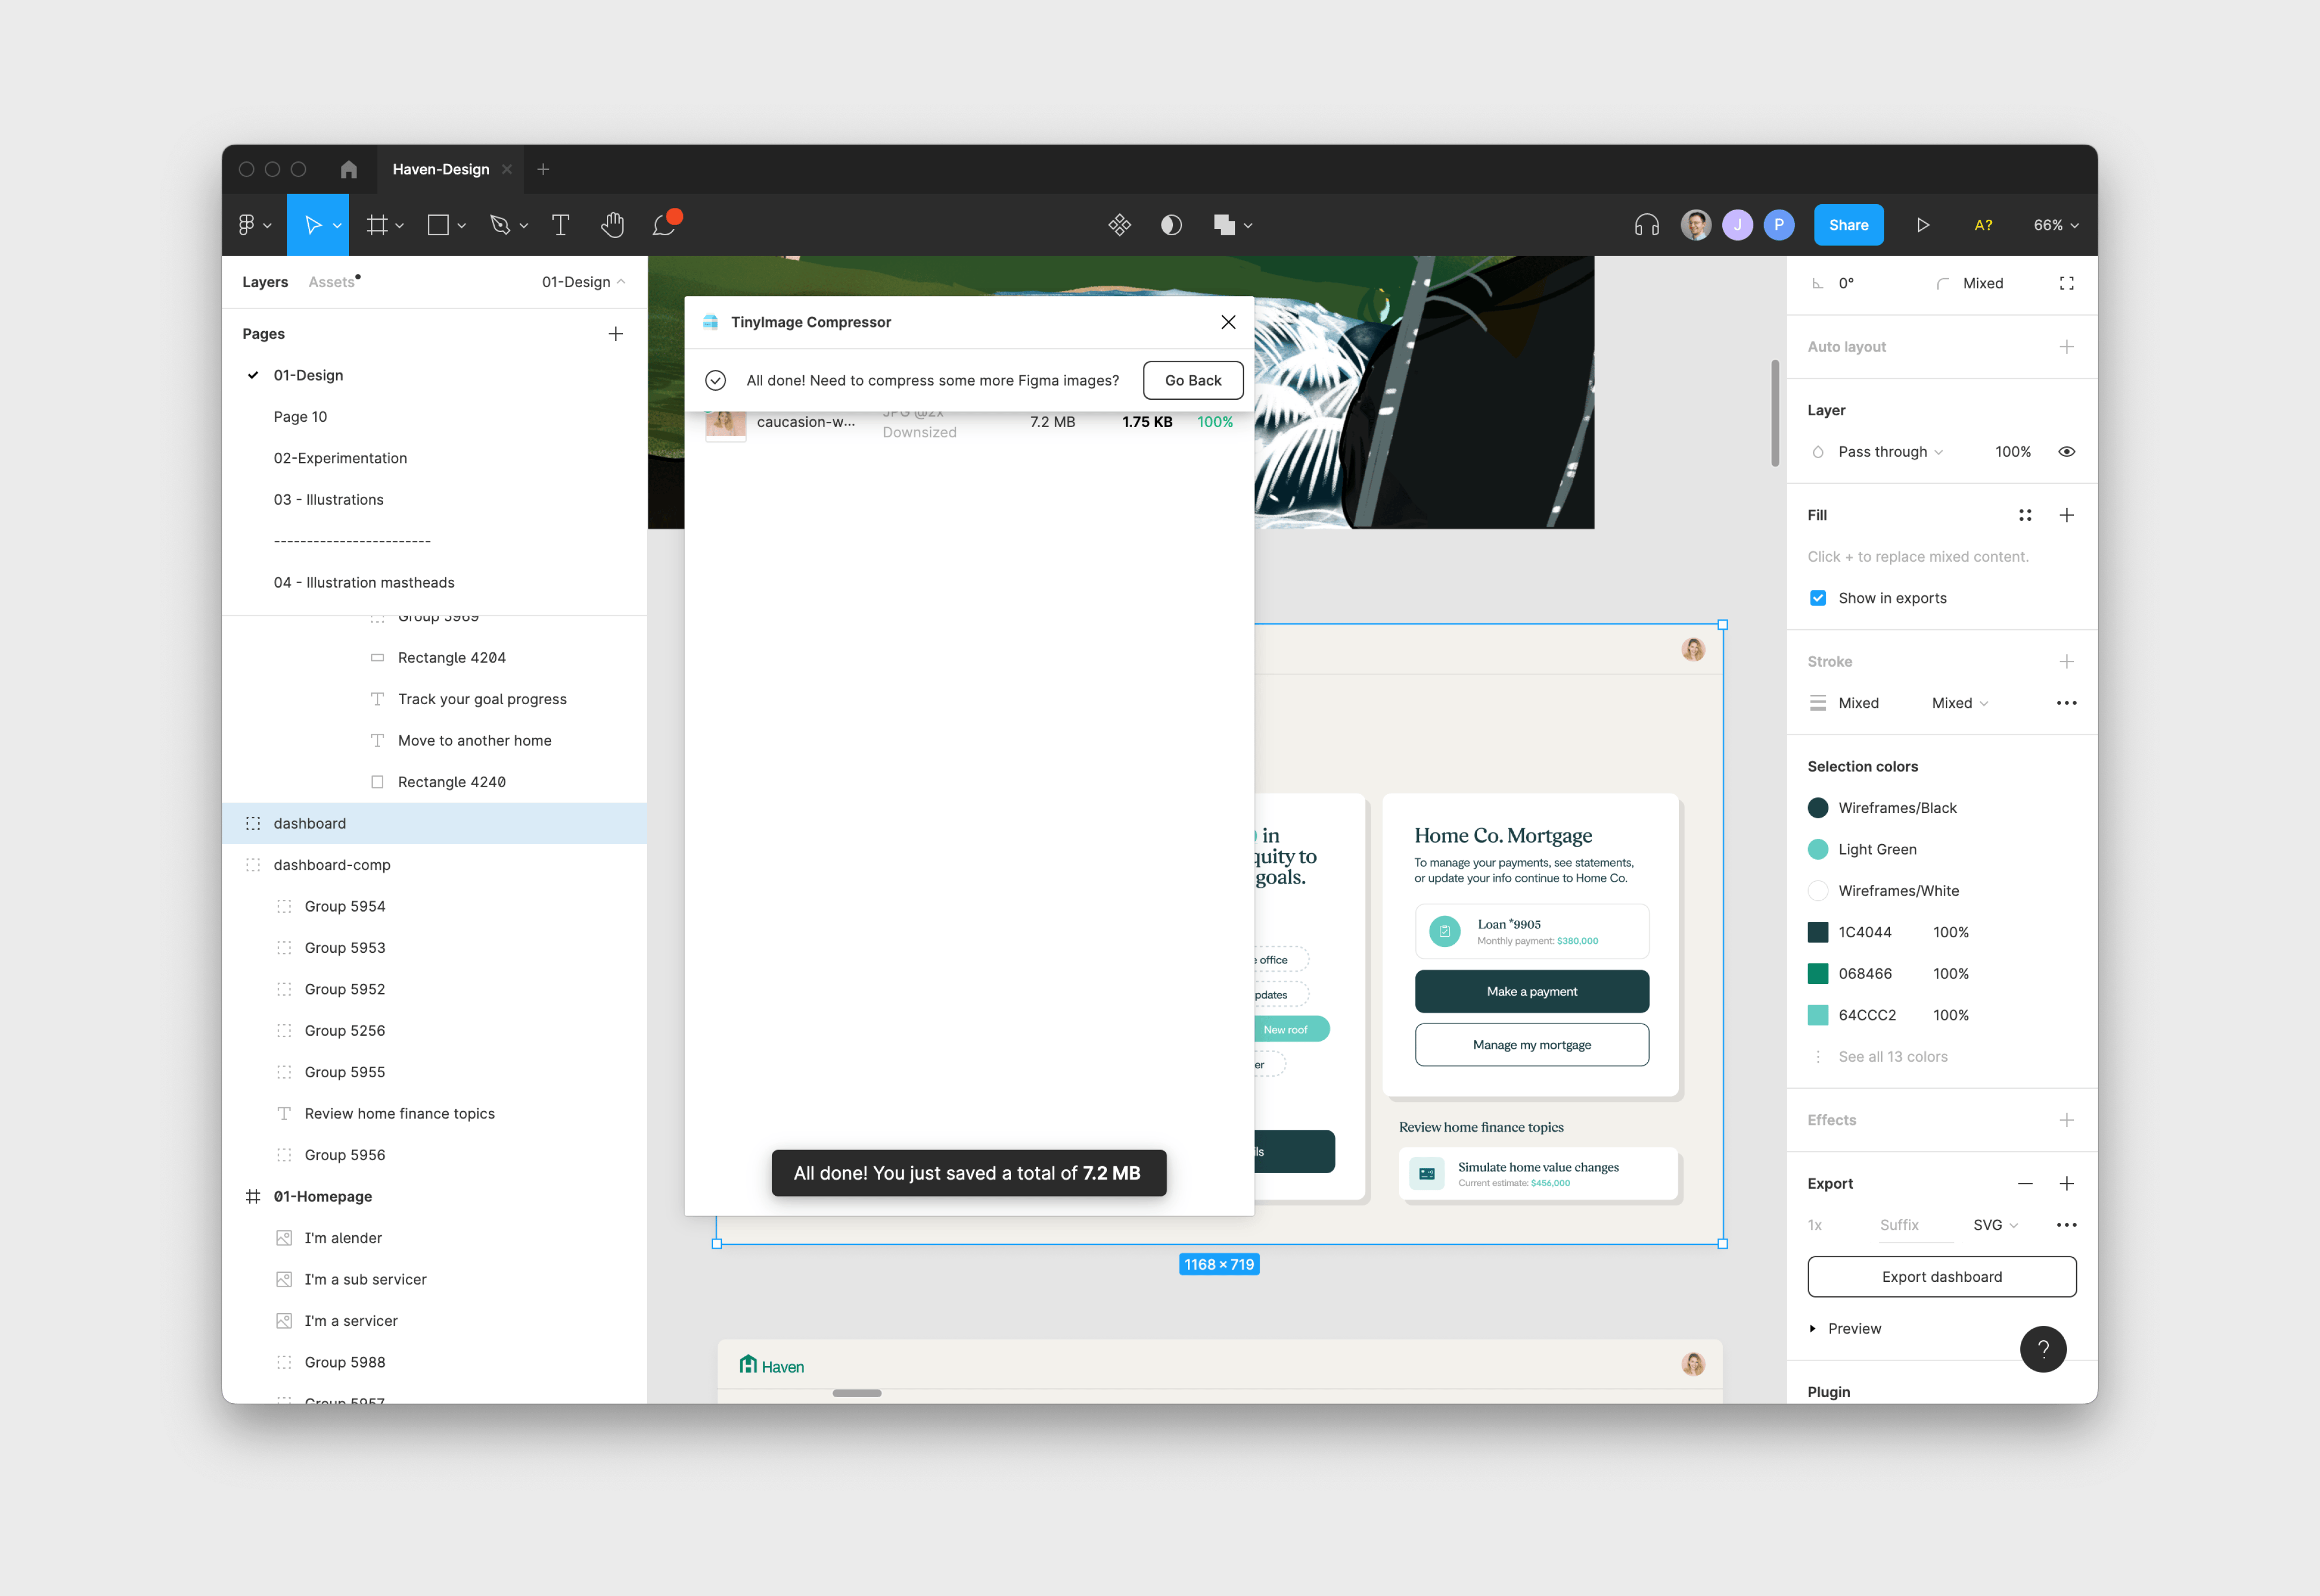
Close that window, and now hit export as SVG normally through Figma.
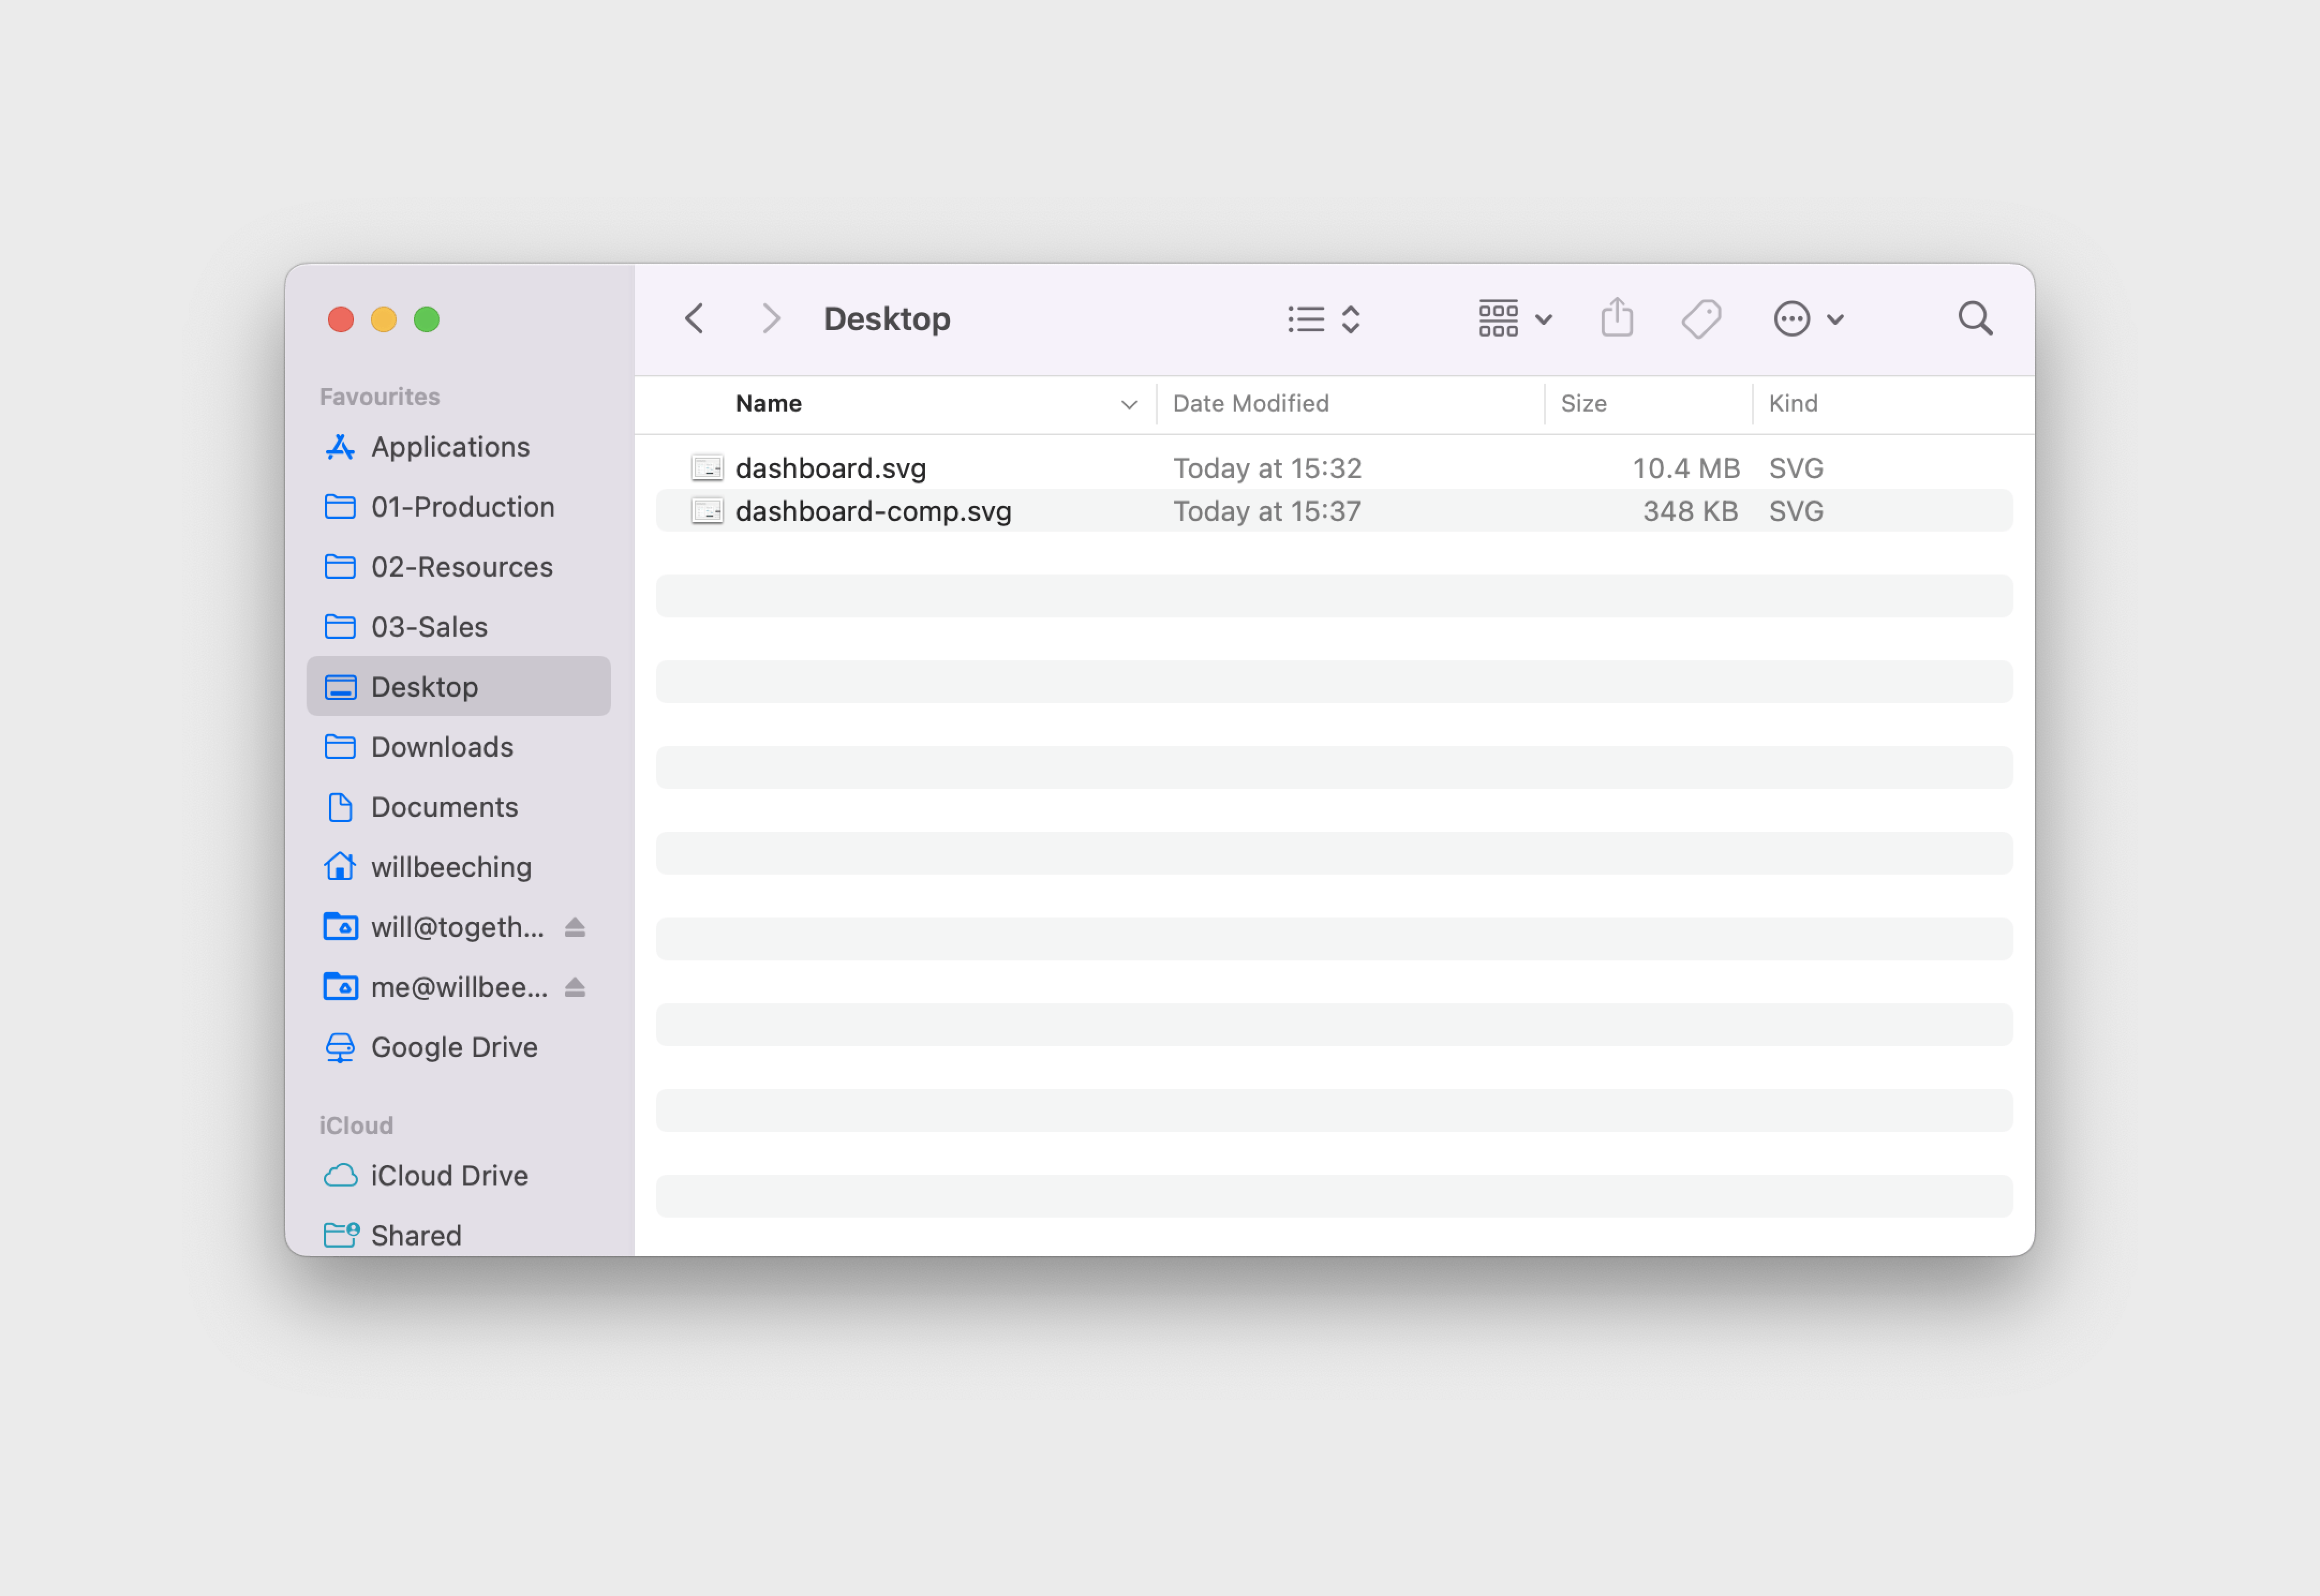
Voila, you now have an SVG with a nice small bitmap in there.
Border Radius
Things like border radius we’re better off doing in development so the client may want to upload photos later and all the corners will be inconsistent. You may need to drag the image out or CMD-Click into it to get the sharp file.

Drop Shadows
Sometimes it’s better to add drop shadows in development too. Take this dashboard for instance, drop shadows add a fair amount of weight and are very simple to add in code.
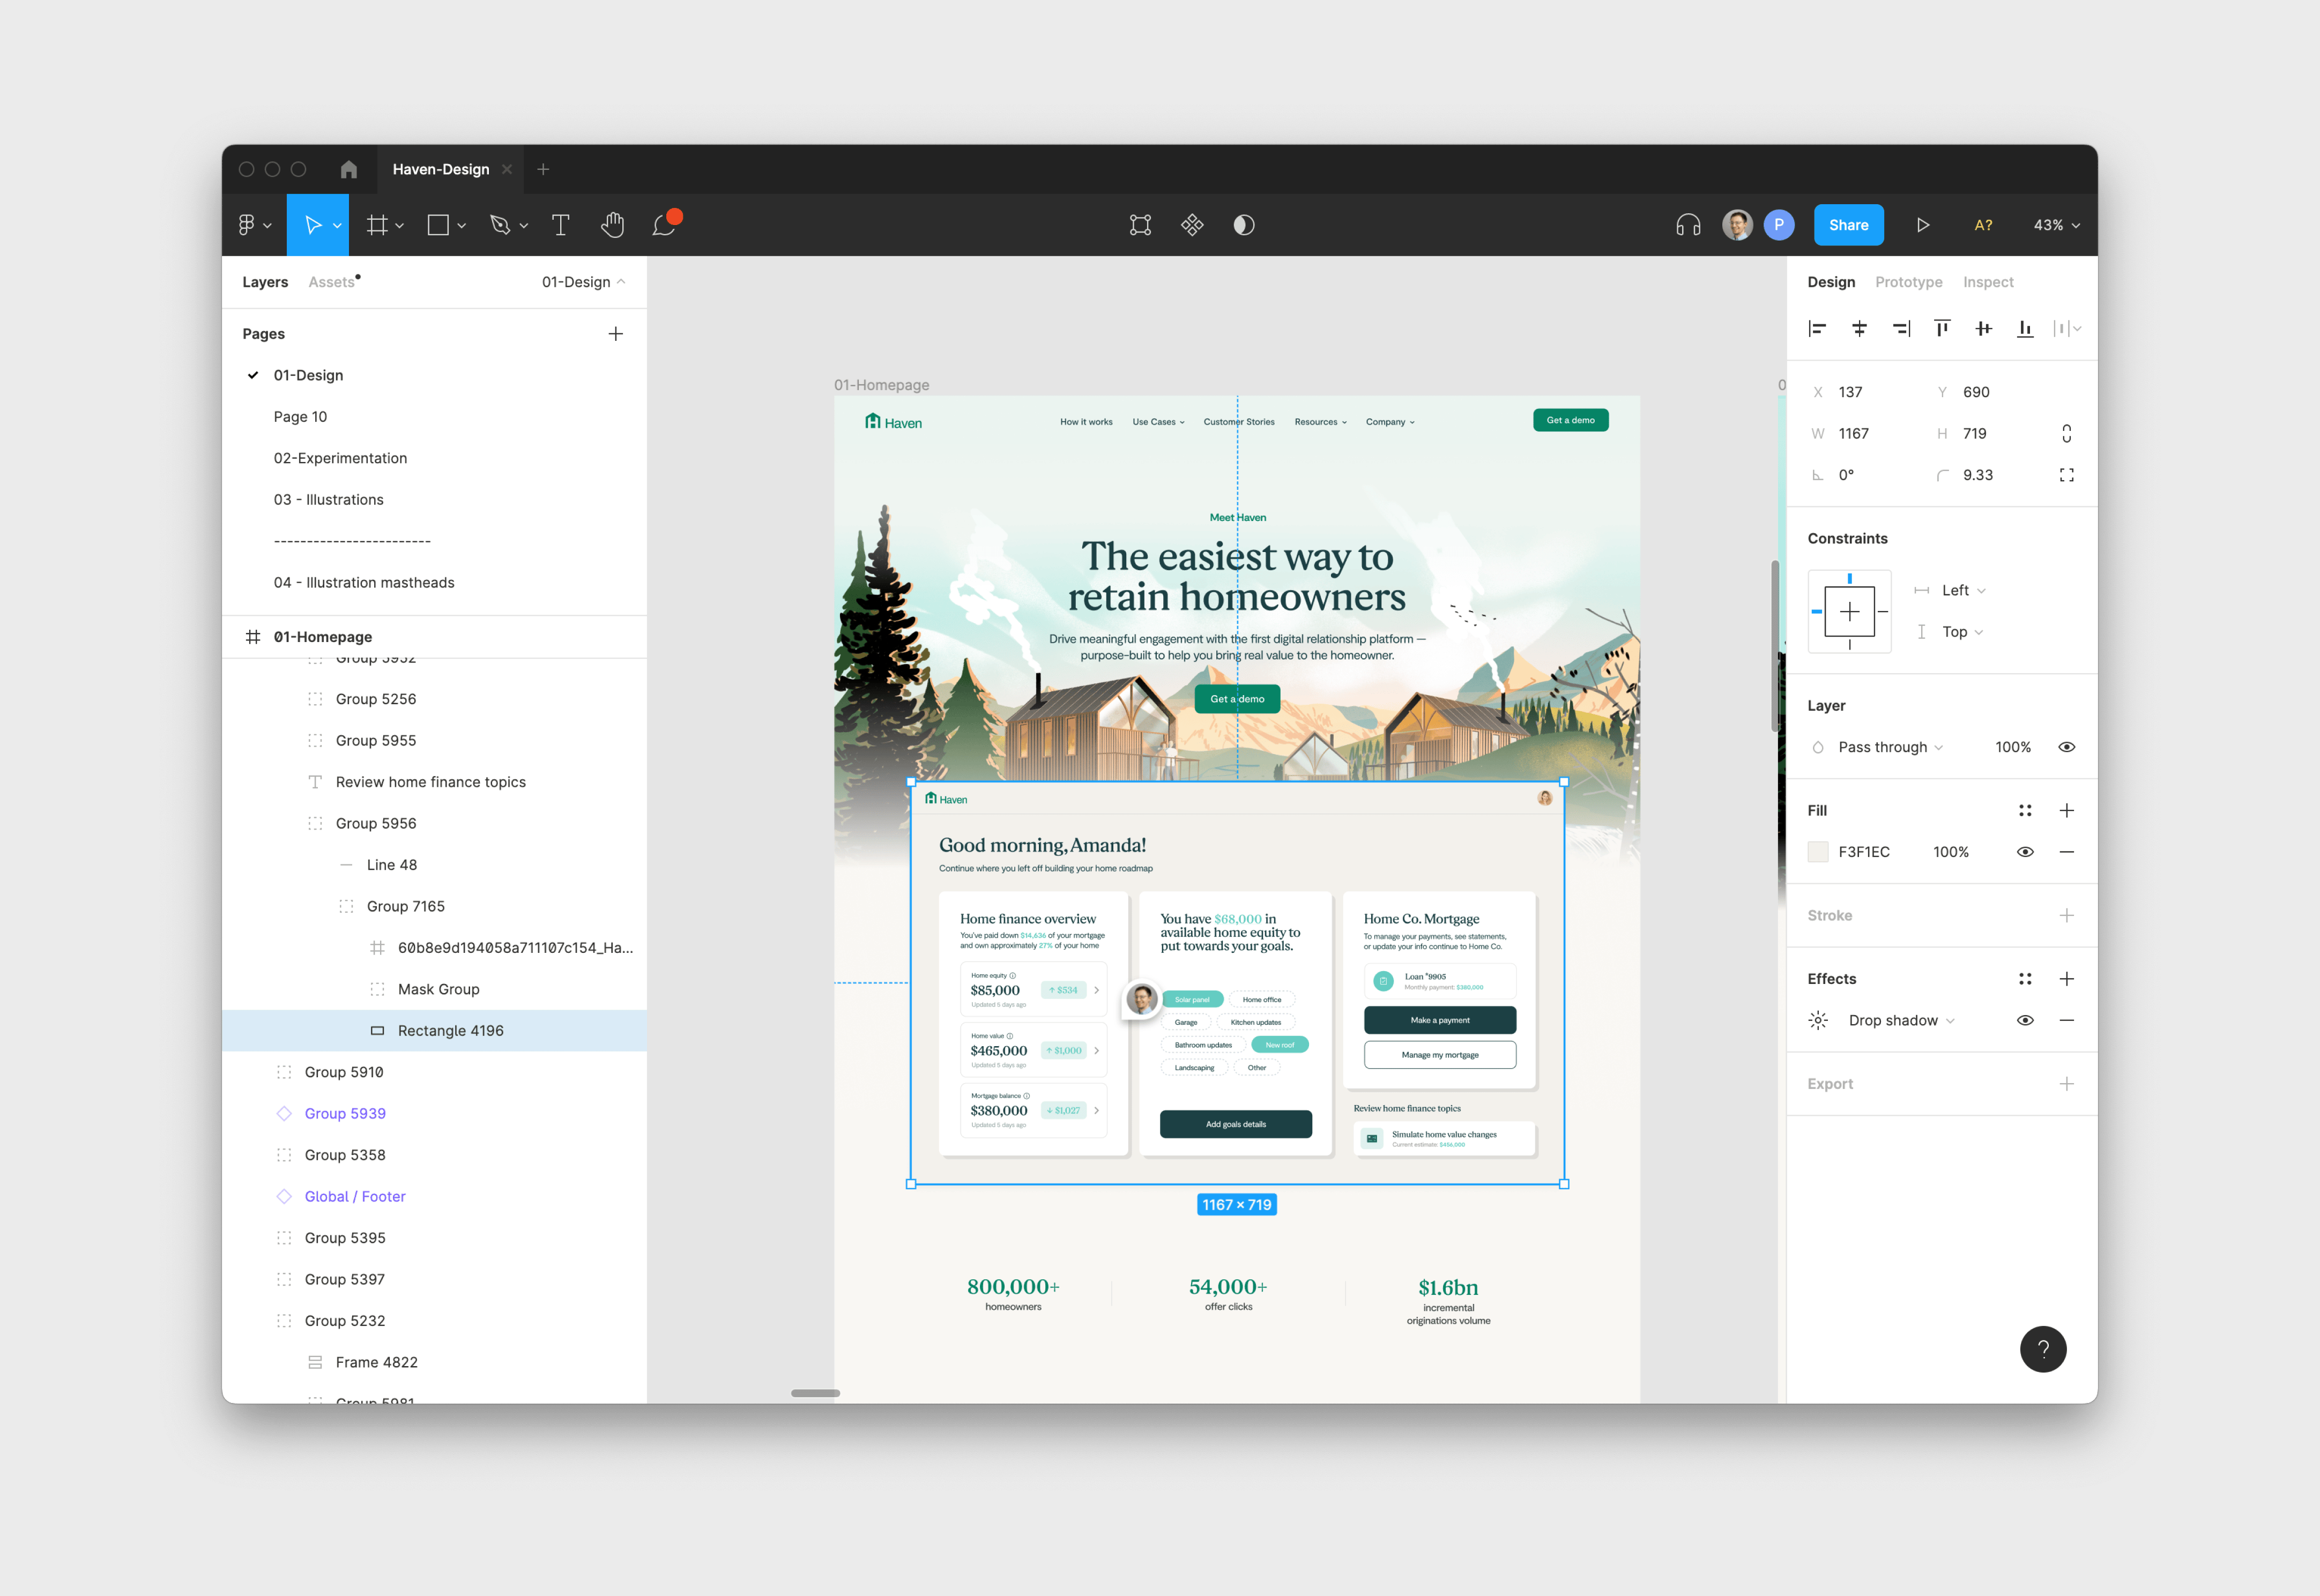
You can easily turn these off, it’s normally applied to the rectangle at the back of an object, if you CMD-Click on the background you should see a drop shadow effect on the right hand side. Just toggle the eye to hide it

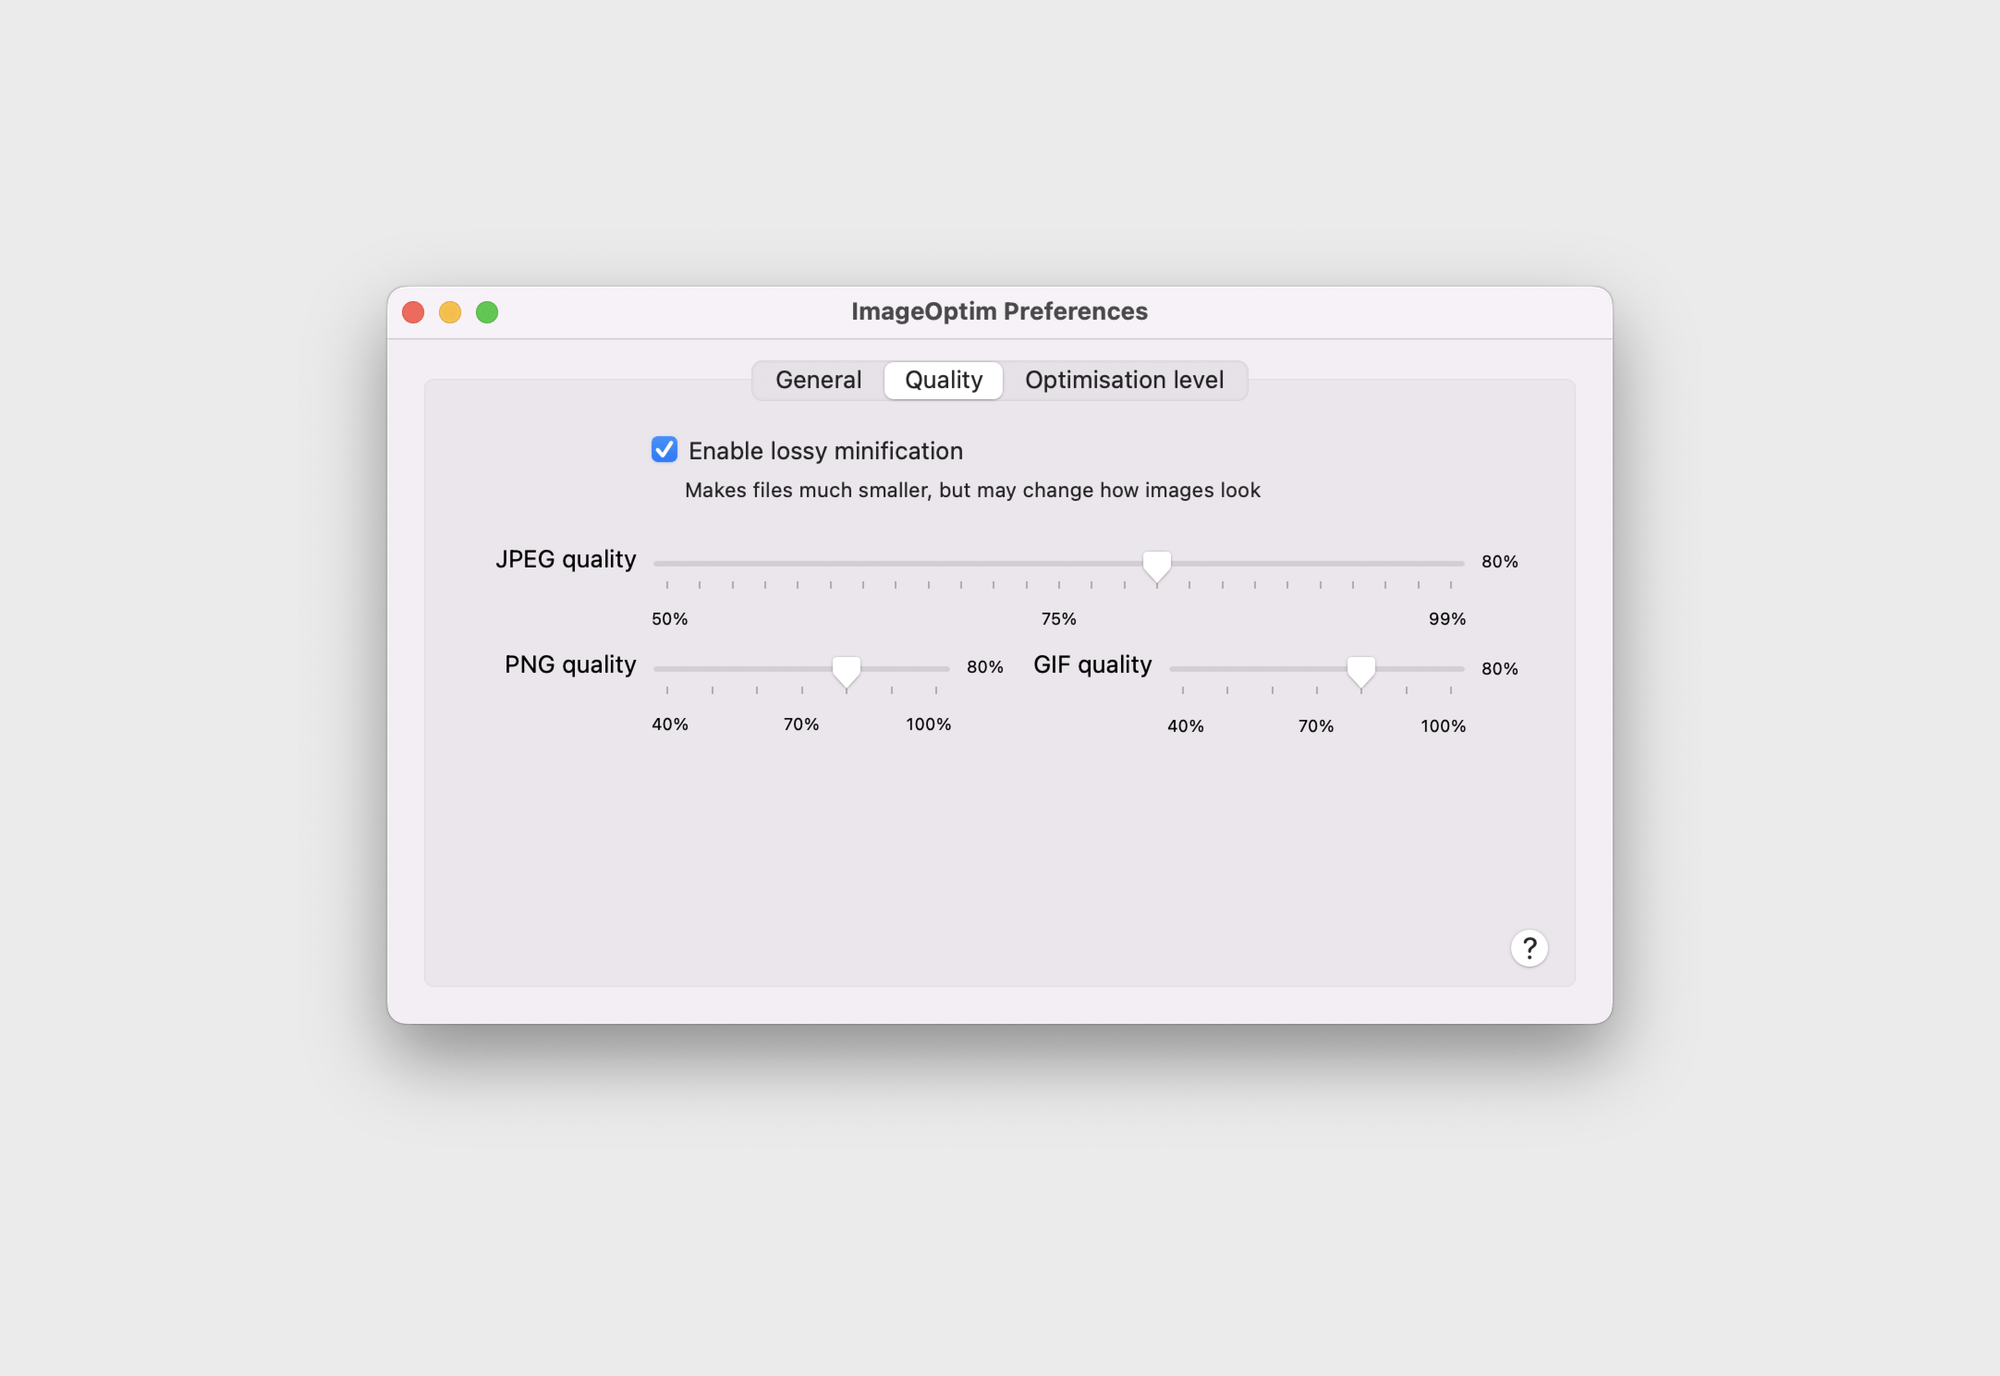
Ideal ImageOptim Settings